Cordial

To integrate Cordial with Poplar you can refer to the Automated Messages section of their documentation while following the step-by-step guide below.
-
Login to Cordial, click the Message Automation dropdown on the left and select the Rest Automations page at the bottom.
-
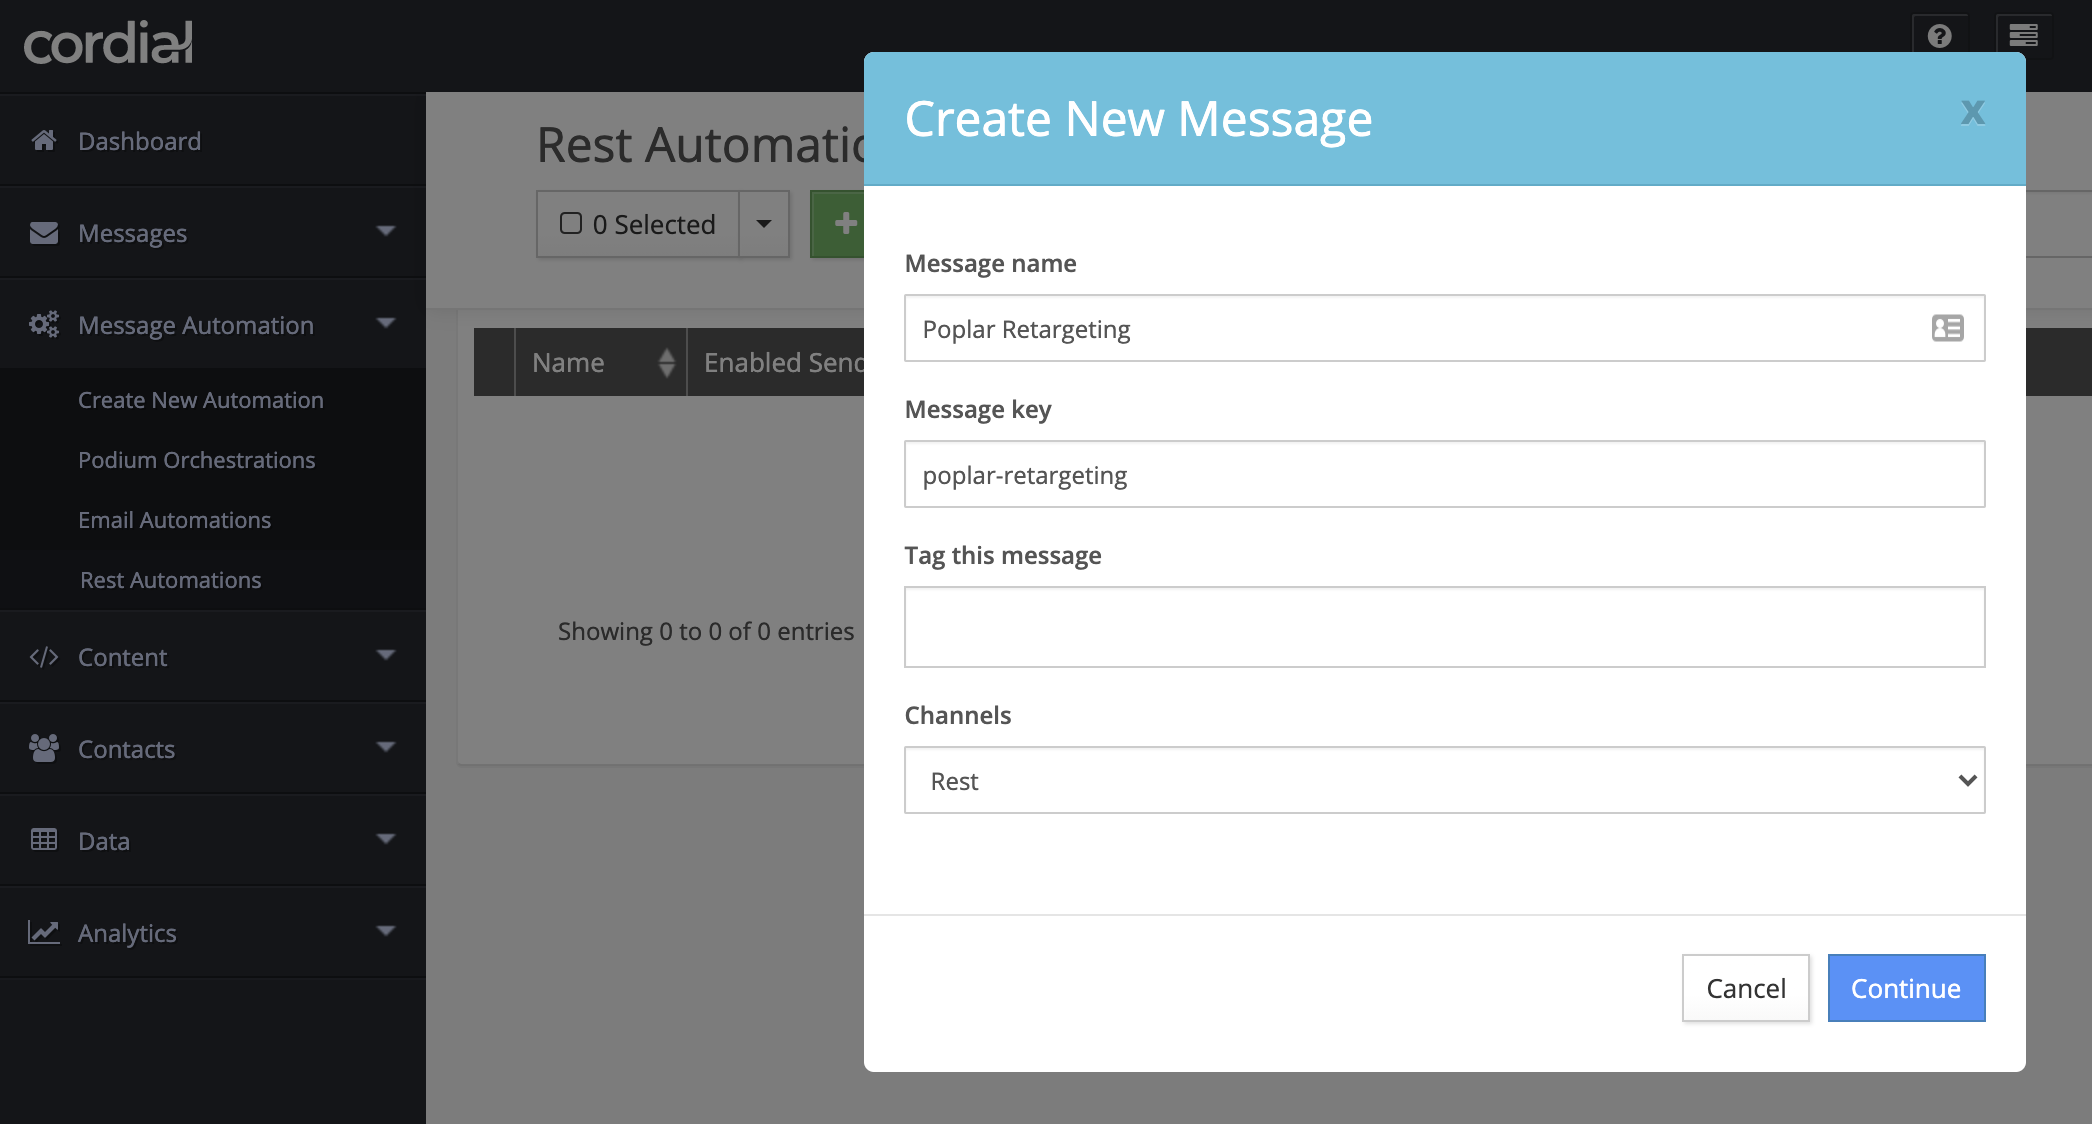
Create a new message automation by clicking the green + New button. Give the message automation a unique name based on use case, select any applicable tags, leave the Channels section set to "Rest" and Continue.
3. You'll be brought to the automation settings where you'll see a list of REST Parameters and REST Post Processing scripts.
4. Click the Edit button to the far right of REST Parameters and enter the following settings:
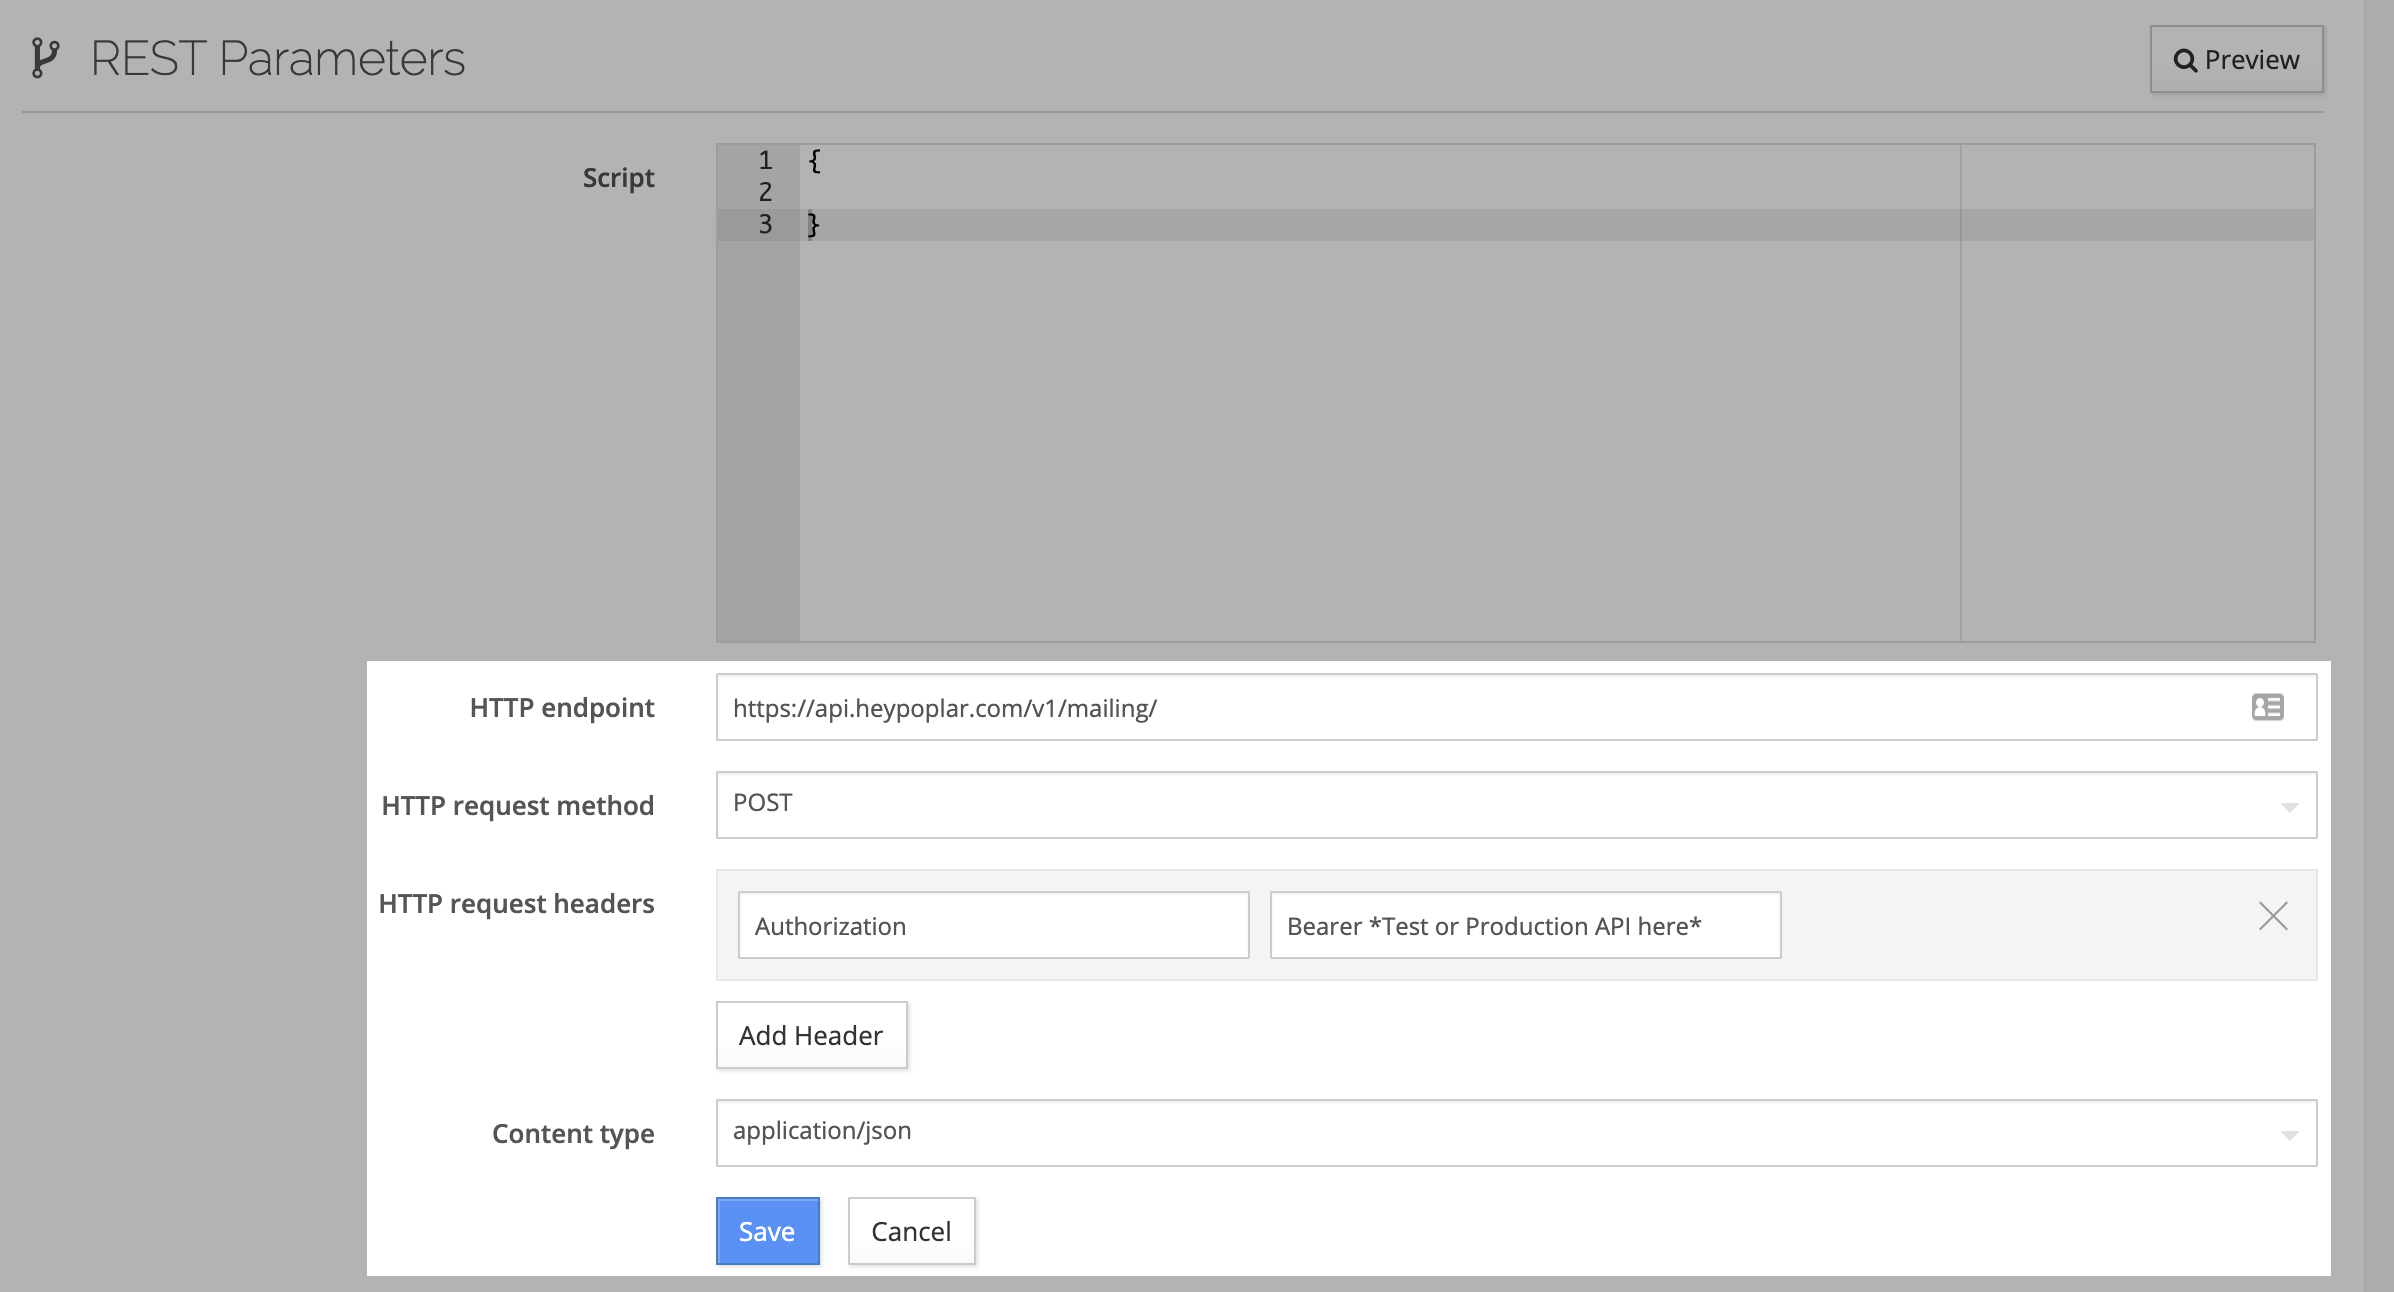
| Parameter | Value |
| HTTP endpoint | https://api.heypoplar.com/v1/mailing/ |
| HTTP request method | POST |
| HTTP request header | Authorization : Bearer < Test or Production API Token> |
| Content type | application/json |
5. The Script section at the top is where you'll enter logic for the recipient data being passed to Poplar. If your Poplar campaign has address enrichment enabled, only email and any other custom merge tag data needs to be passed. If mailing to existing customer addresses, you'll pass in the full address. Examples of each can be copy, pasted, and adjusted as needed:
Mailing Address
{
"recipient": {
"full_name": "{$contact.first} {$contact.last}",
"address_1": "{$contact.geo_mailing.street_address}",
"address_2": "{$contact.geo_mailing.street_address2}",
"city": "{$contact.geo_mailing.city}",
"state": "{$contact.geo_mailing.state}",
"postal_code": "{$contact.geo_mailing.postal_code}"
},
"campaign_id": "XXXXX-insert unique campaign ID-XXXXX",
"creative_id": "XXXXX-insert unique creative ID (optional)-XXXXX"
}
Address Enrichment
{
"recipient": {
"email": "{$contact.channels.email.address}"
},
"campaign_id": "XXXXX-insert unique campaign ID-XXXXX",
"creative_id": "XXXXX-insert unique creative ID (optional)-XXXXX"
}

8. If the connection is successful, Publish and move on to the Event Triggered settings on the left under Sending Methods.
9. Click the Edit button to the far right of Trigger Events to set the desired trigger conditions. Audience Filters can also be added to refine your target audience if needed.

10. Be sure to Save then Enable the trigger to set it live! Recurring sending methods can also be enabled for use cases such as buyer anniversary, monthly customer birthday discounts, etc.

For large batched mailings, you'll want to export your audience segment from Cordial and then mail via a One Time Send. If you have any questions reach out to support@heypoplar.com for assistance.
Merge Tags & Variable Data
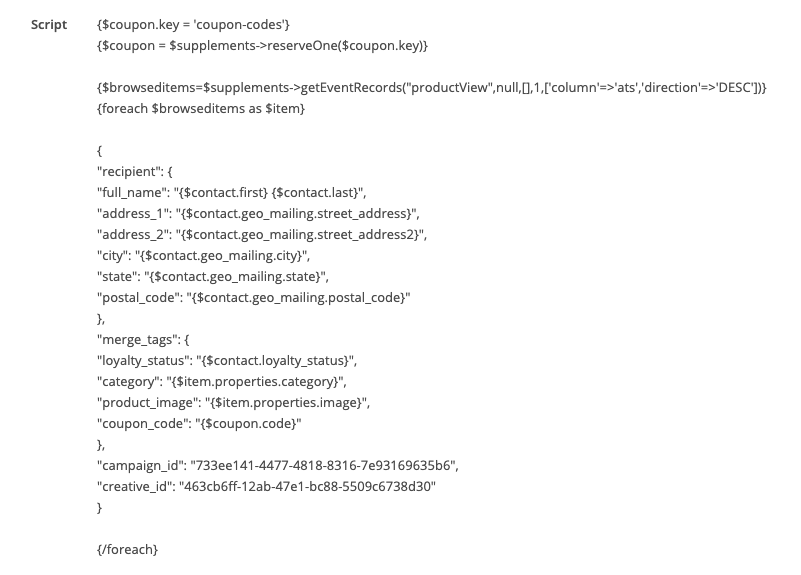
When setting up your Rest Automation, you'll need to include the merge tags and their dynamic values as an object in the Script section of your REST Parameters. Here's one example:
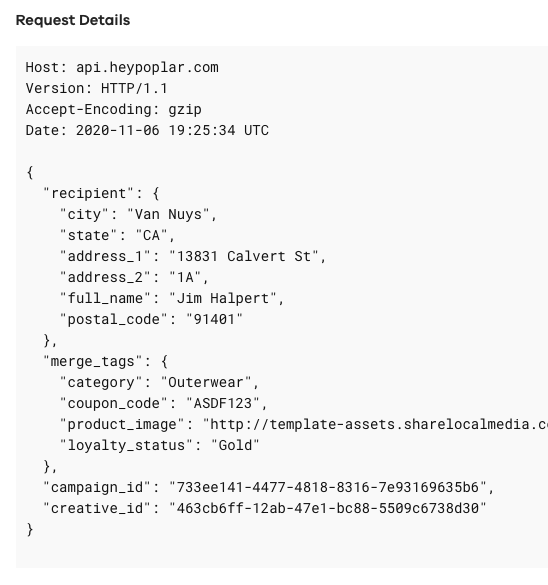
You'll know the request is successful and the merge tags are mapping accordingly if a test mailer appears in the campaigns History tab, same as above. Click into the mailer and scroll down to see the request details:
Reach out to support@heypoplar.com for additional assistance