Iterable

If you are an Iterable user, you can push email or full address data to Poplar's Mailing, Audiences, or Do Not Mail endpoints. Before integrating and sending tests, make sure you've completed the following:
- Create a campaign in Poplar
- Upload creative (can be a placeholder creative for testing purposes)
- Locate both your Production Access Token and Test Access Token on the API page of your Poplar Account
- 1
-
Integrations → Journey Webhooks
Log into Iterable and navigate to
Journey webhooks under the
Integrations tab:
- 2
-
New Webhook
Click the green New Webhook button and enter the following criteria:
- 3
-
Add HTTP Header
Click the
Add Header button and enter the following values:
- 4
-
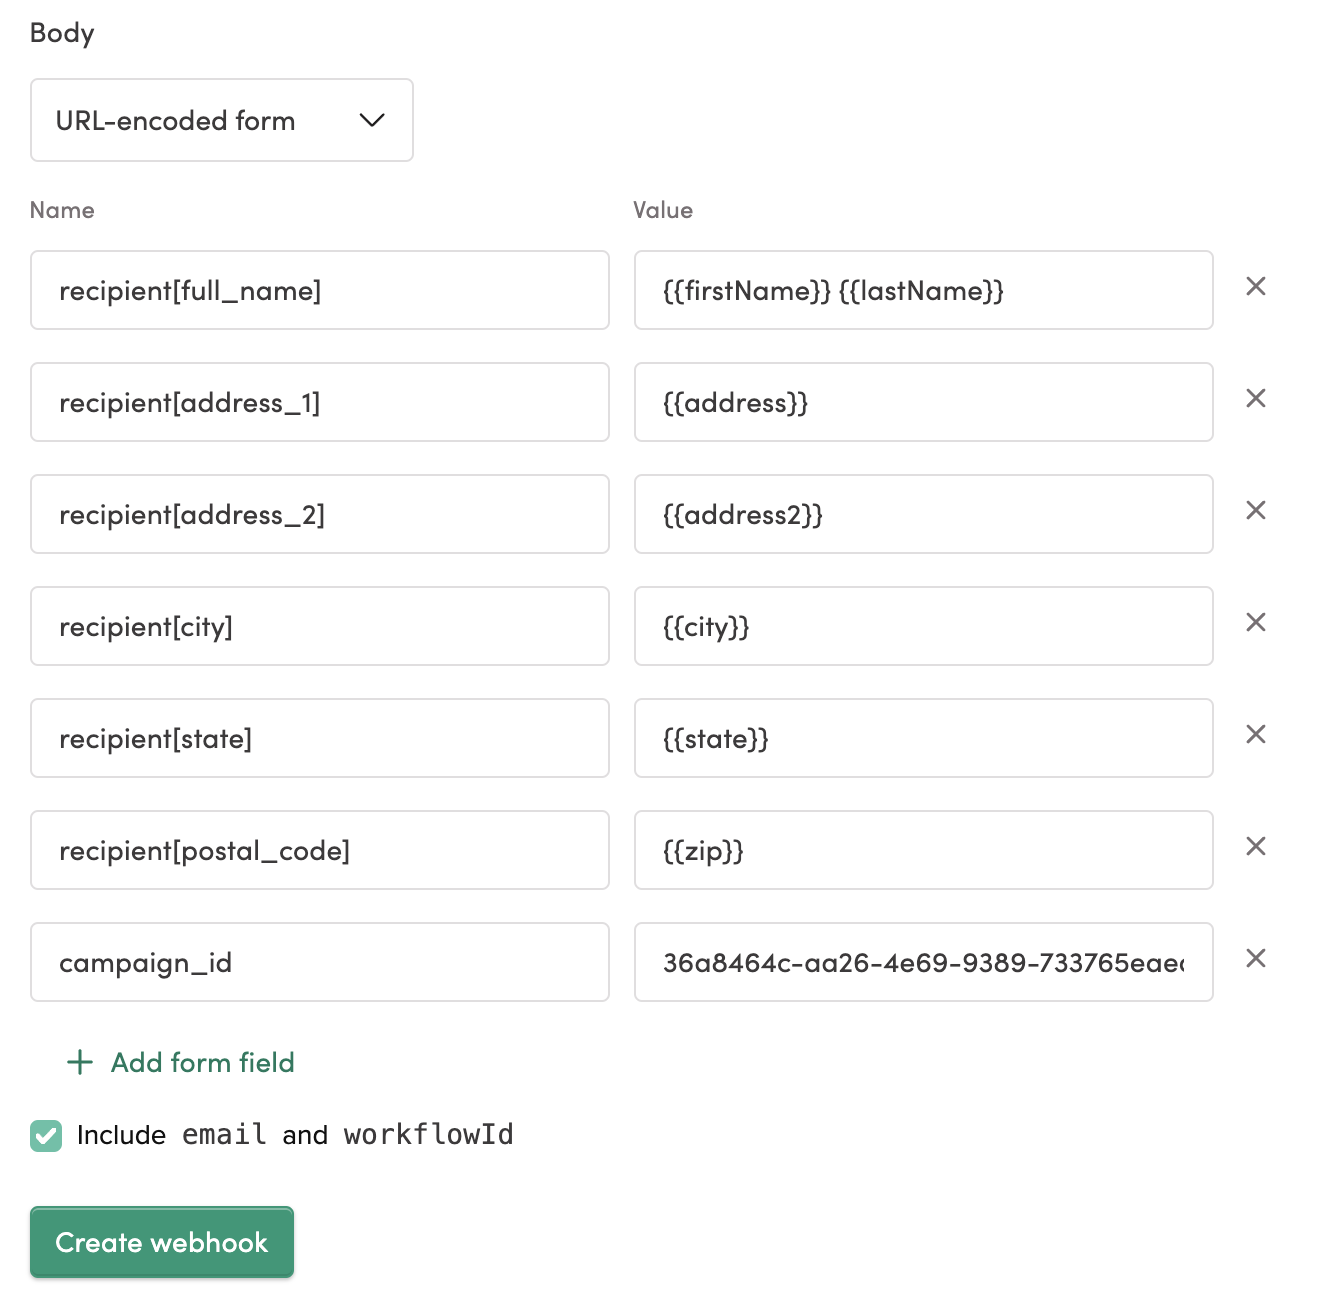
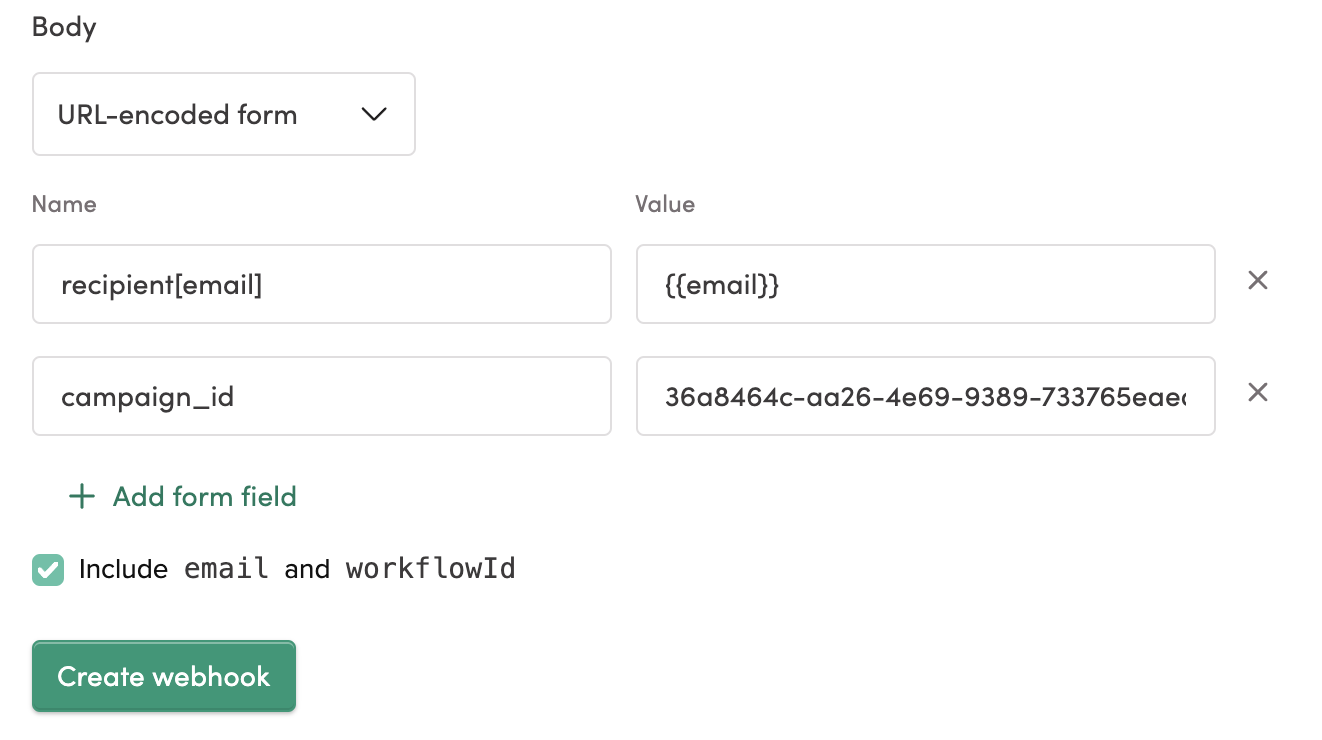
Add Form Fields
Make sure the Body is set to
URL-encoded form, then click the
Add Form Field button to begin adding each webhook field. The form fields entered here construct all data that will be sent to Poplar for the mailing. The values on the right should correspond to how/where your data is stored in Iterable, and the keys on the left represent the values they'll map to in Poplar.
- 5
-
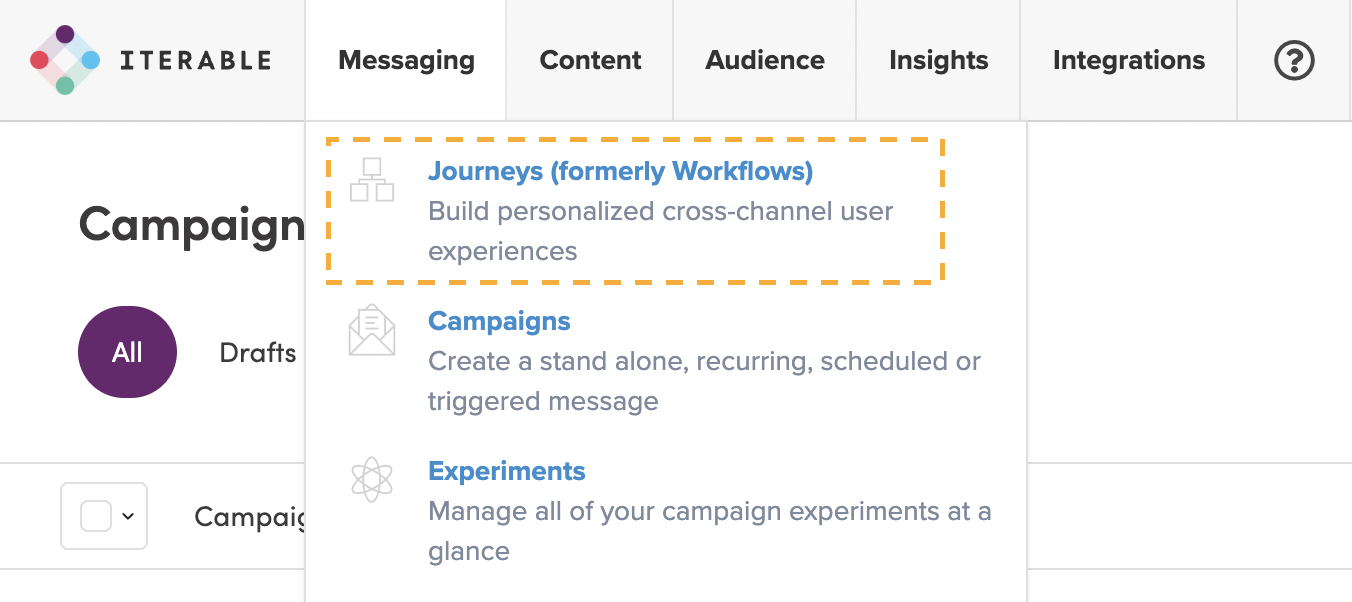
Messaging → Journeys
Once you've double checked your fields for typos and saved your webhook, navigate to
Journeys under the
Messaging tab:
- 6
-
Call Webhook
Under
Integrations on the right, select the
Call webhook option:
- 7
-
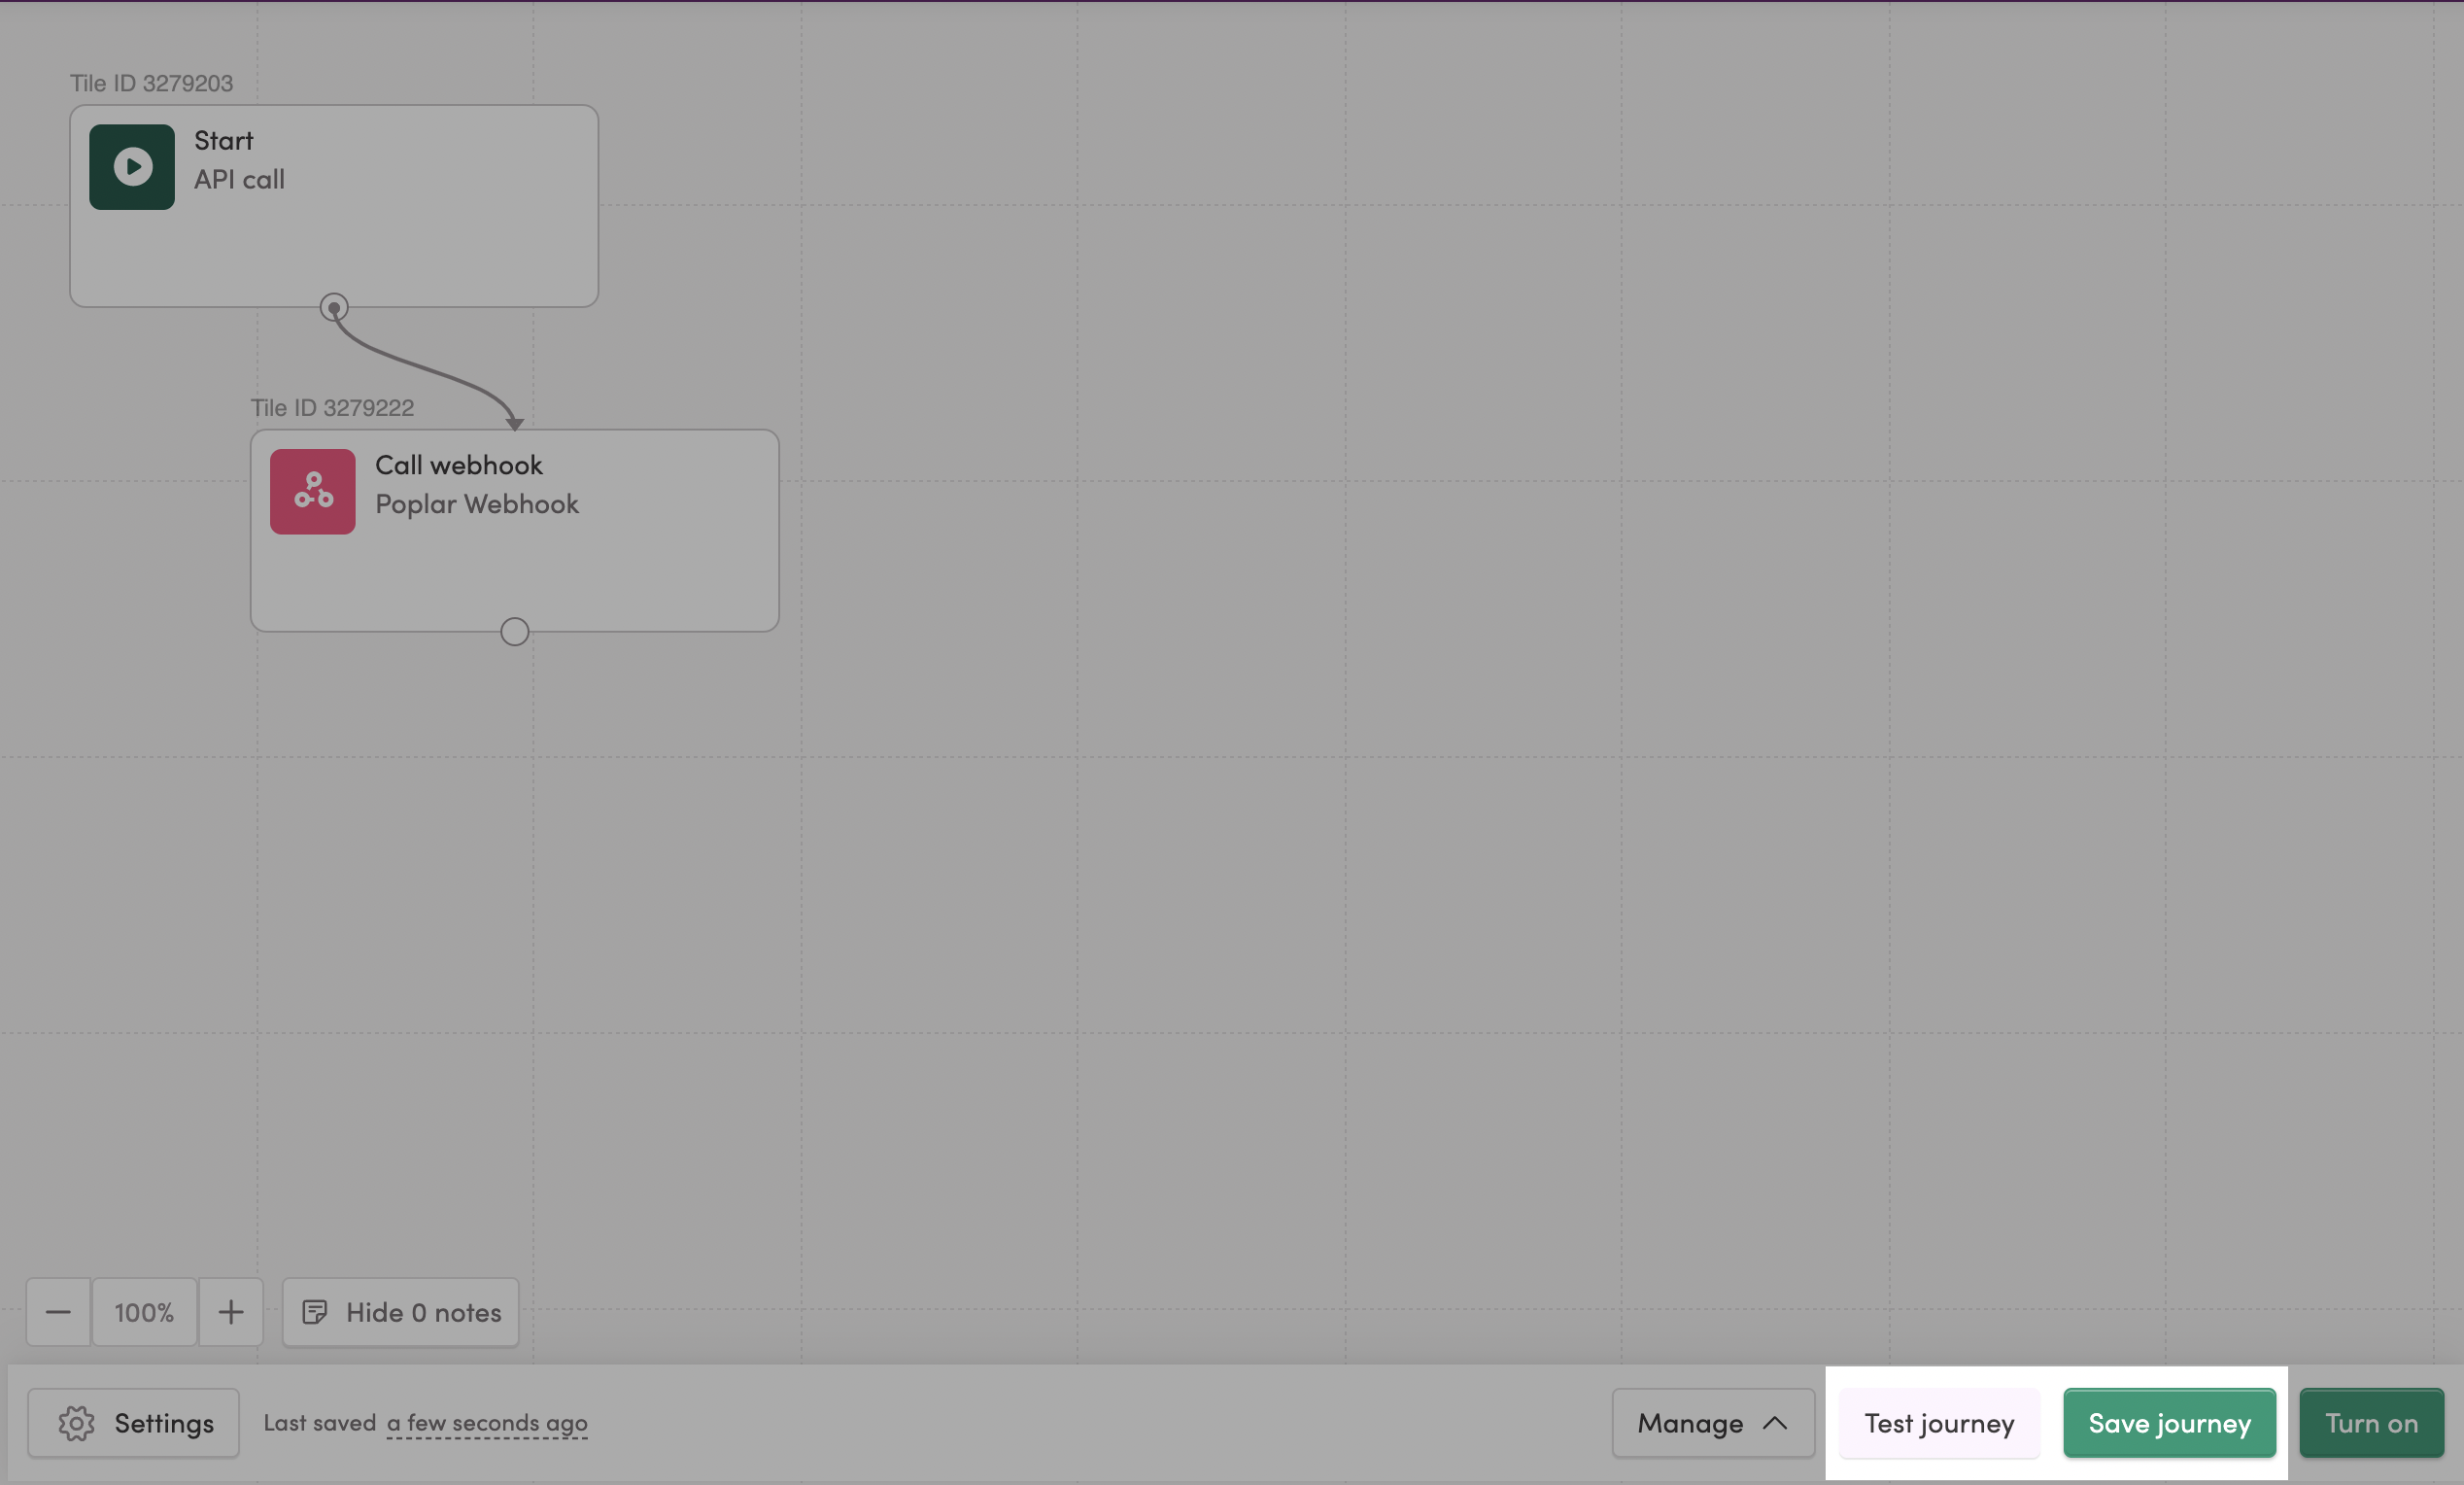
Send Test Trigger
When brought back to the workflow, click
Save Journey to access the
Test Journey... option:
- 8
-
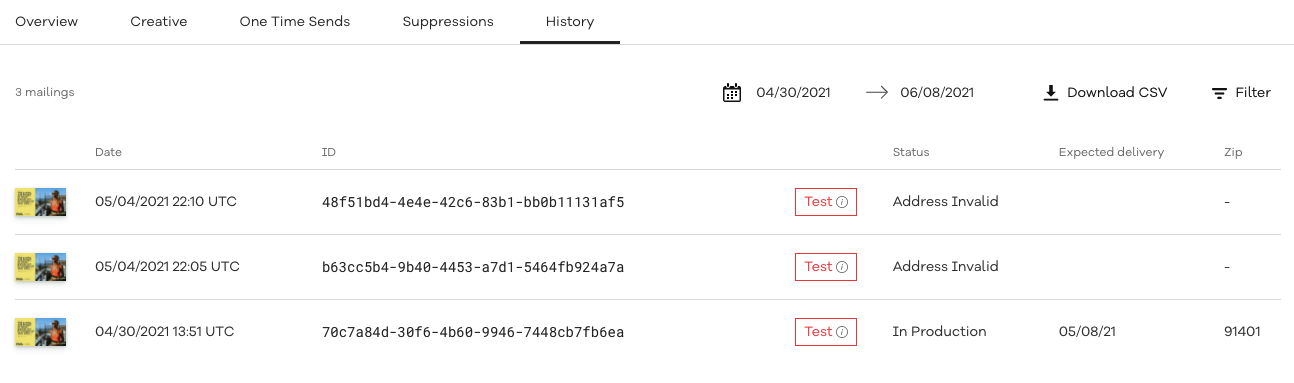
History Tab
Head to the
History tab of your campaign within your Poplar account to see successful tests come through:
- 9
-
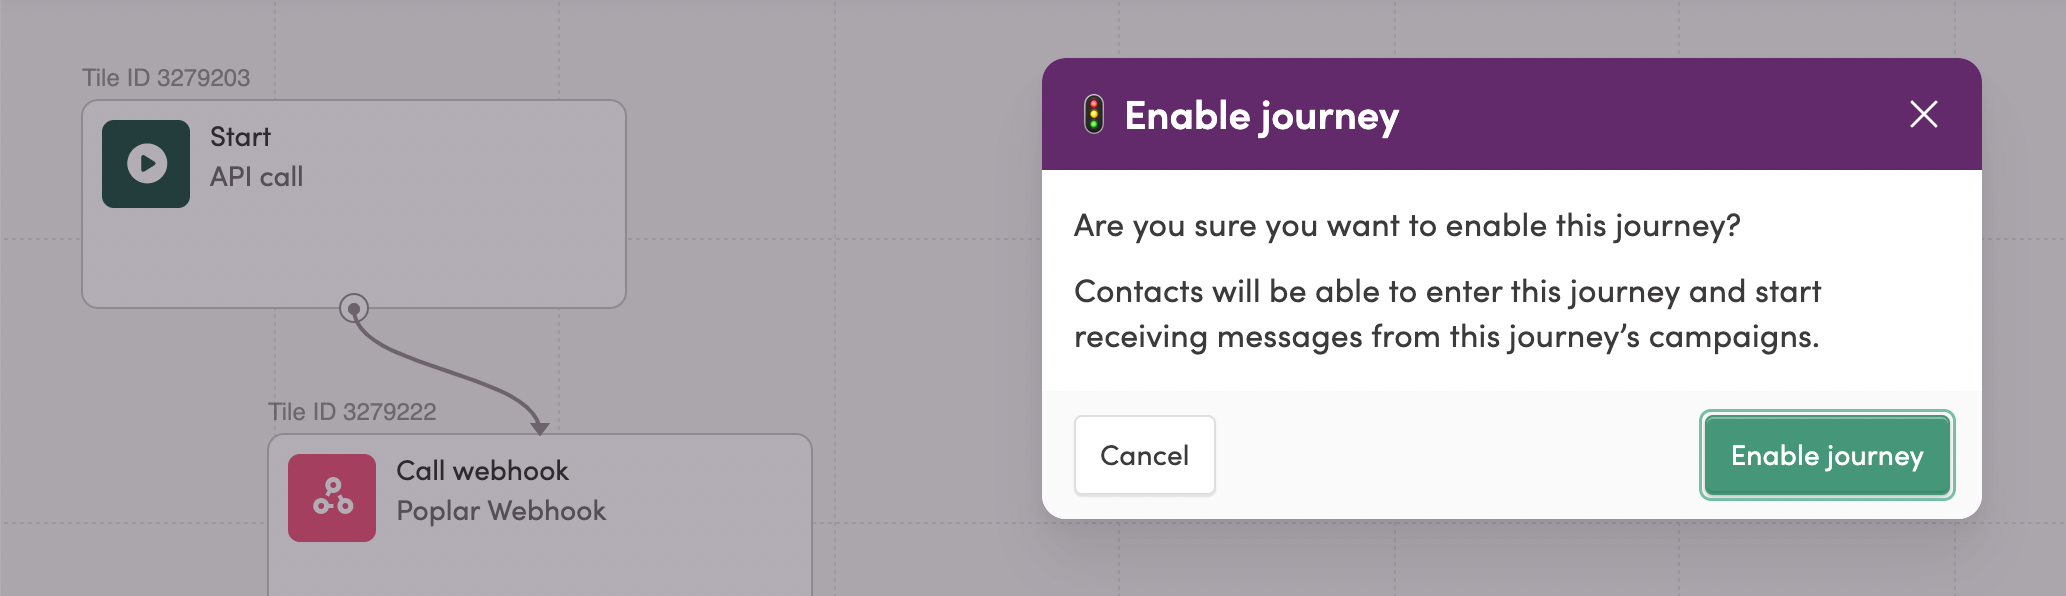
Go Live!
Once you've confirmed the connection is successful and customer data is coming through to Poplar as desired, use your
Production Access Token in place of your Test token, save all updates accordingly and make sure your journey is Enabled:
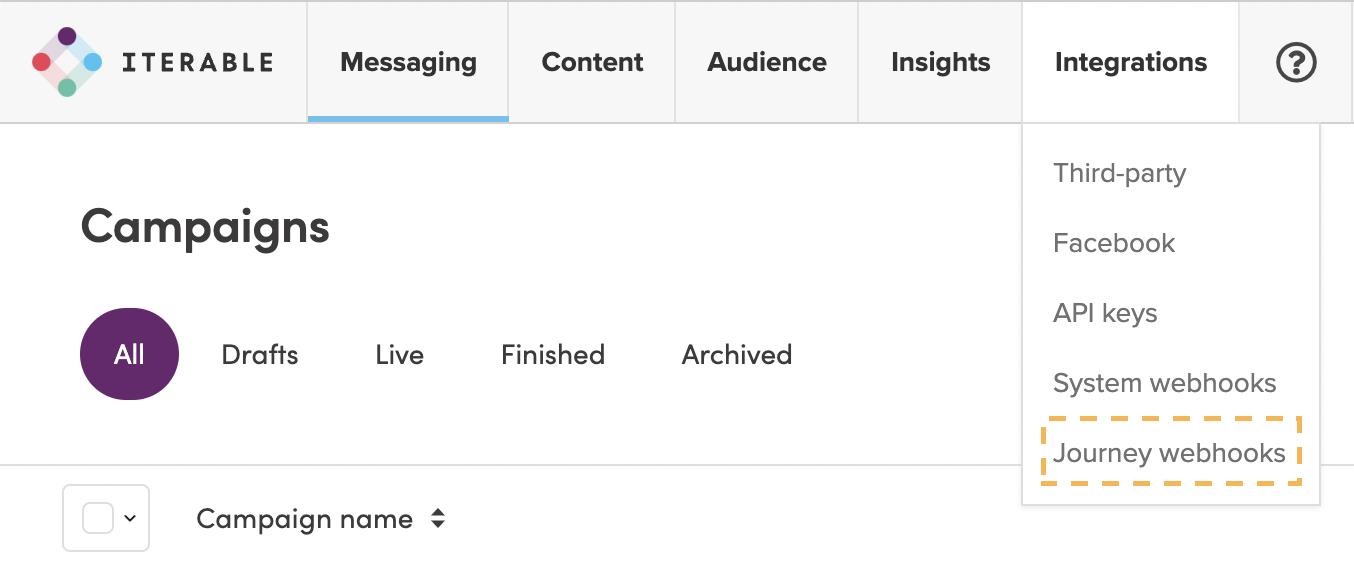
If you don't see an Integrations tab, reach out to your Iterable account owner for permission to access.
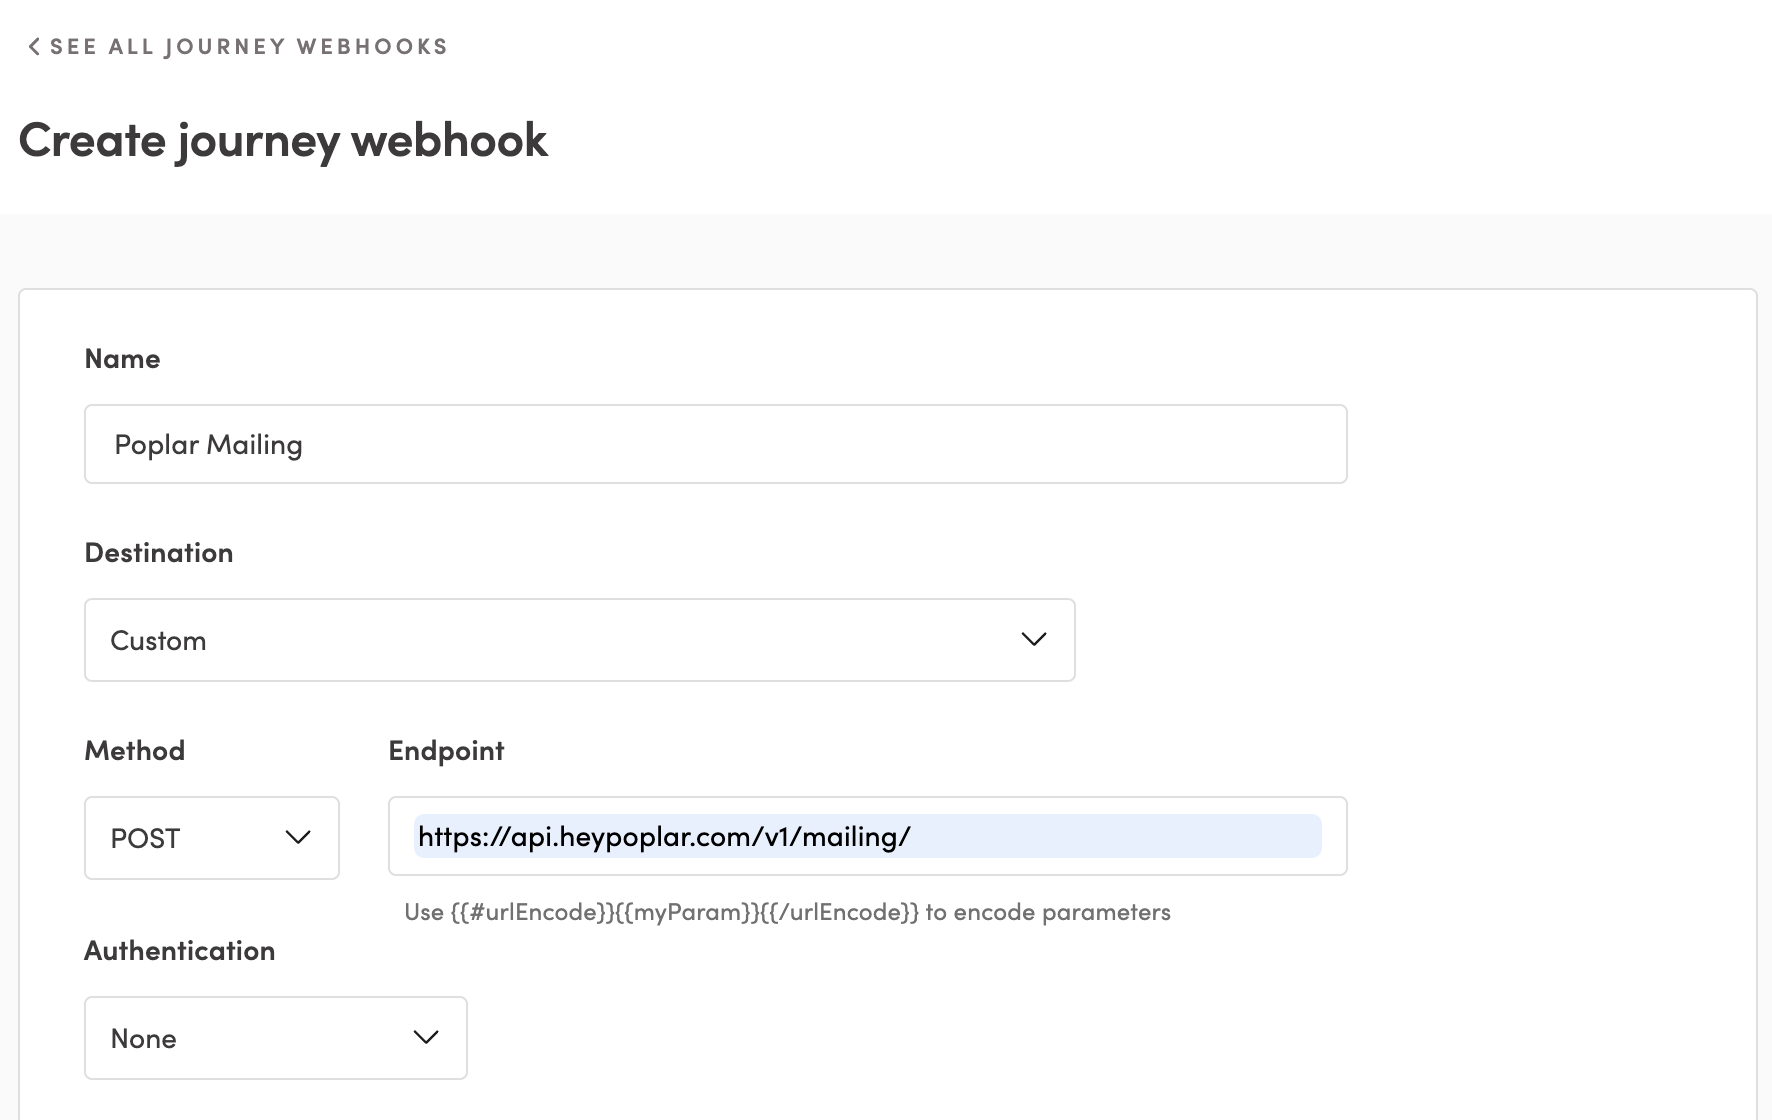
| Field | Value |
| Name | * Poplar Mailing Webhook* |
| Method | POST |
| URL | https://api.heypoplar.com/v1/mailing/ |
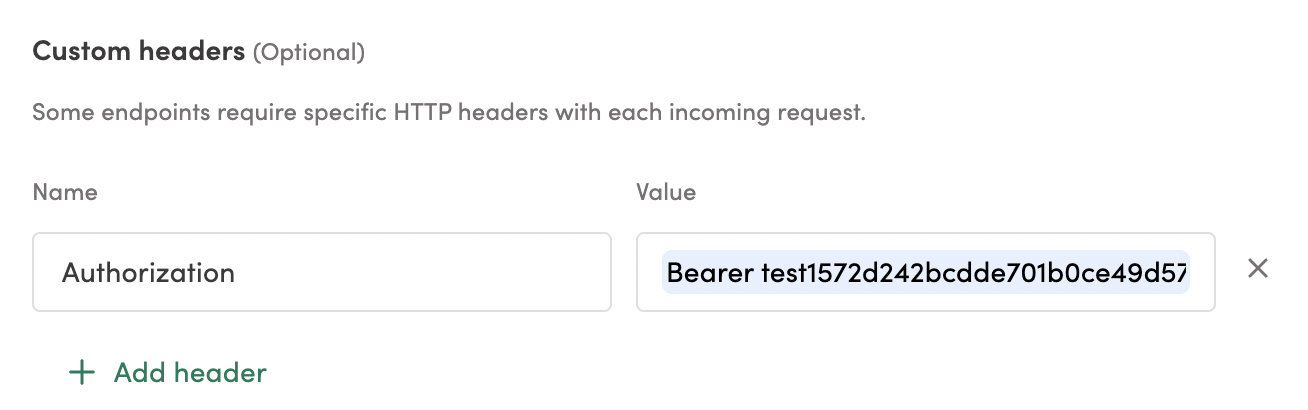
Head to the API page of your Poplar account to locate your Production and Test Access Tokens. You'll want to first test your trigger using your Test Access Token. Once it's confirmed the connection is successful, this token can be swapped out for your Production key to set the trigger live.
| Key | Value |
| Authorization | Bearer *Test or Production API Access Token* |
We strongly recommend you use the Test token provided in the API section of your Poplar account, to ensure your trigger is set up successfully. After you see it working, swap it out for the Production token which will set the trigger live.
Navigate to your campaign's Overview tab to find the campaign_id, navigate to the creative tab and click into one of your creatives to find the creative_id if it needs to be specified. If creative_id is not specified, only the default or active creatives (if A/B Testing) under the campaign will mail.
Address Data
If you have customer Shipping or Billing addresses stored in Iterable and you want to use them for mailing:
Emails for Address Enrichment
If you have customer email addresses and want to use them to mail with Poplar's Address Enrichment feature:
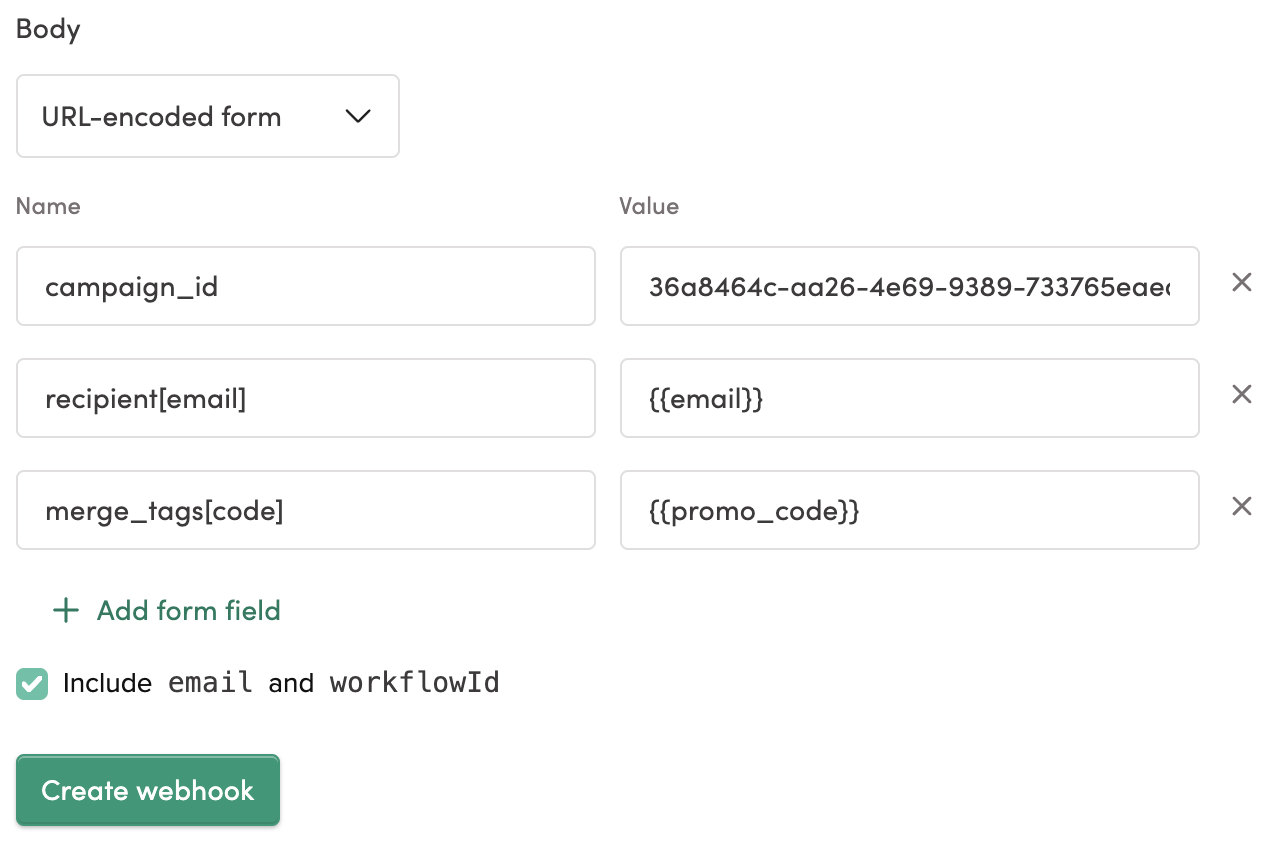
Custom Merge Tags
If using custom merge tags in your creative artwork, make sure the value inside the merge_tags[ *value*] object maps to the value used in your {{custom.*value*}} creative.
Be sure to include all relevant data - if you're passing full addresses for mailing but plan to track using email addresses, be sure to include the email field as well.
Select the workflow with which you'd like to implement the Poplar webhook, or click Create New Journey to build a new one from scratch.

Drag and drop the action into your flow, then double click the node to access the settings:
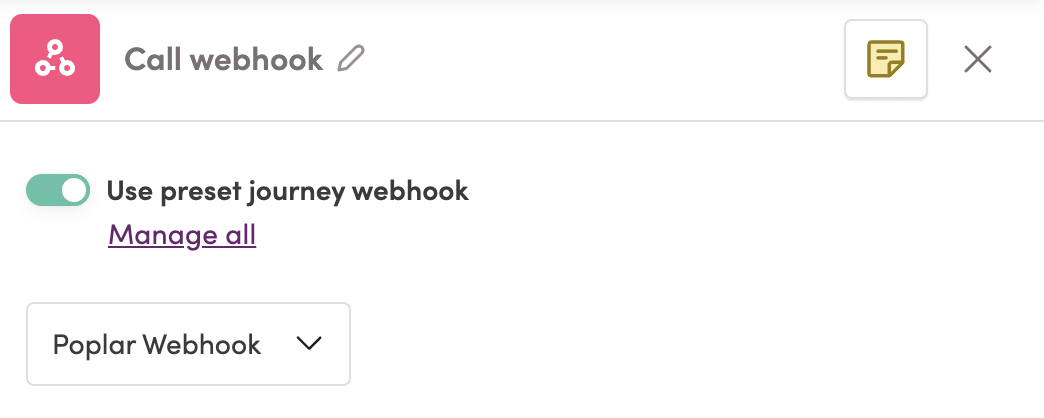
Make sure Use preset journey webhook is turned ON so you can select your Poplar webhook from the dropdown, then click Update.
Enter an Email address to receive trigger and hit Test Journey.
Make sure the email address used contains all the data listed in your webhook, under their user profile - if recipient data is missing the test will not go through.
Click into one of the mailers to see a PDF proof with the user data applied. Scroll down to the Request Details to confirm the data coming through the platform matches your Iterable journey.
If using custom merge tags, make sure they are properly located within the merge_tags object in your Request Details.
Additionally, make sure the Request Details look similar to the sample API Request shown in the Data Guide under your Creative:

Need help? Reach out to support@heypoplar.com for assistance.