Sailthru

We've provided the Poplar-specific webhook directions below. Sailthru's documentation is also available.
Create a new or select an existing Lifecycle Optimizer Flow under the Messaging tab in Sailthru.
https://api.heypoplar.com/v1/mailing/

campaign_id=XXXXX&creative_id=XXXXX&recipient[email]={email}
Mailing Address:
campaign_id=XXXXX&creative_id=XXXXX&recipient[full_name]={profile.vars.full_name}&recipient[address_1]={profile.vars.address_1}&recipient[address_2]={profile.vars.address_2}&recipient[city]={profile.vars.city}&recipient[state]={profile.vars.state}&recipient[postal_code]={profile.vars.postal_code}
"Profile" Object Syntax
When formatting your Mailing Address payload, use & to separate parameters. Be careful not to include any breaks or spaces because they will prevent the data from passing to Poplar in the right format. Nested parameters live inside square brackets [...] and continue to nest within those brackets. For example, payload campaign_id=XXXXX&recipient[full_name]=Poplar&recipient[postal_code]=10004 would appear:
{
    "campaign_id":"XXXXX",
    "recipient": {
        "full_name":"Poplar",
        "postal_code:"10004"
    }
}
When pulling data, it is important to know when to use profile. vs profile.vars. Sailthru's Profile Object model is a useful reference.
- Use profile.{insert-field-name} to pull from Sailthru's core data.
- Use profile.vars.{your-custom-variable-name} to pull any custom variables you created that were not originally fields specified by Sailthru.
- Note: The customer email is an exception to the above. It is specifically referenced as {email}.
See the Sailthru Profile Object for complete details.
| key | value |
campaign_id |
Copy from the right side of the Campaign > Overview |
creative_id |
(optional) Copy from the individual creative page under Campaign > Creative |
full_name |
(optional) You can also replace with a fixed string like Current Resident for use on the address block |
first_name |
When using first & last name instead of full name in your webhook you must use BOTH or it will error out |
last_name |
|
address_1 |
|
address_2 |
|
city |
|
state |
|
postal_code |
|
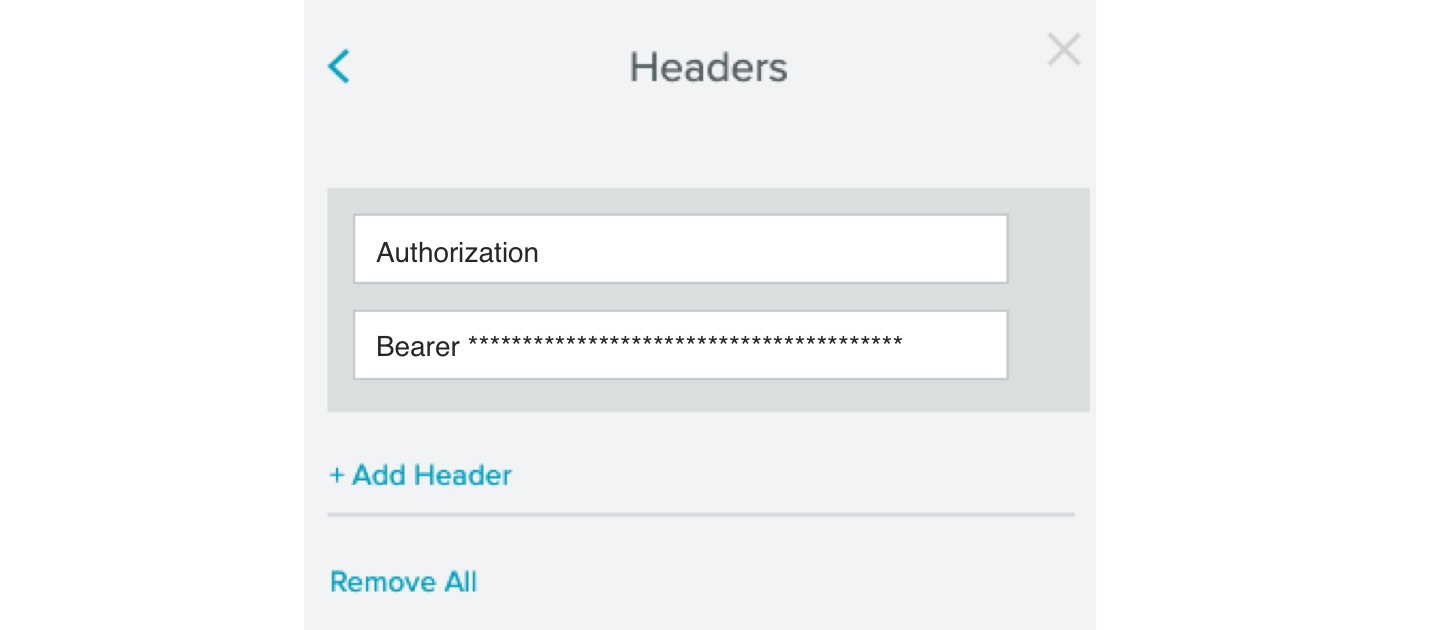
Authorization key and set the
*Bearer Your API Key* (make sure to also replace the asterisks*)