Mailchimp
Connecting Mailchimp via Zapier

1. Log into your Zapier account and from your dashboard, click MAKE A ZAP to begin the new trigger setup.
2. You'll then select Mailchimp as the Trigger. When it comes to picking the type of event to trigger on we recommend either "New Subscriber" if you want to target all new subscribers to a list, or "New Subscriber with Tag" that will allow you to target a specific segment that gets a tag applied manually or use an automated workflow in Mailchimp to apply a tag at a specific step in the flow and then use that tag to trigger the mailing.
3. Once you've selected the type of event you'll connect your Mailchimp account to Zapier.

- Select the audience that your workflow is in, then "Create a new tag". Name it something to correspond to this mail campaign.
- Go to the workflow that will trigger the mailing, then click the arrow dropdown to "Edit", then select the email you want to trigger the mailing by clicking "Pause and Edit". Select "Post-send Action: Add" then on the dropdown select "Add Tag" and pick the Tag you recently created in step.
- Head back to Zapier to the Create action step and select the "New Subscriber with Tag" and then refresh the dropdown to pull in your newly created tag on the next field.
5. Pull in Sample Data, to kickstart your segment you may need to manually apply the tag to a member of the audience in Mailchimp. Then click the big blue " Continue" button.
6. You're now ready to configure the Action step of the Zap, search for and select the Poplar (BETA) App to use as your action; the destination where you'll be sending your data.
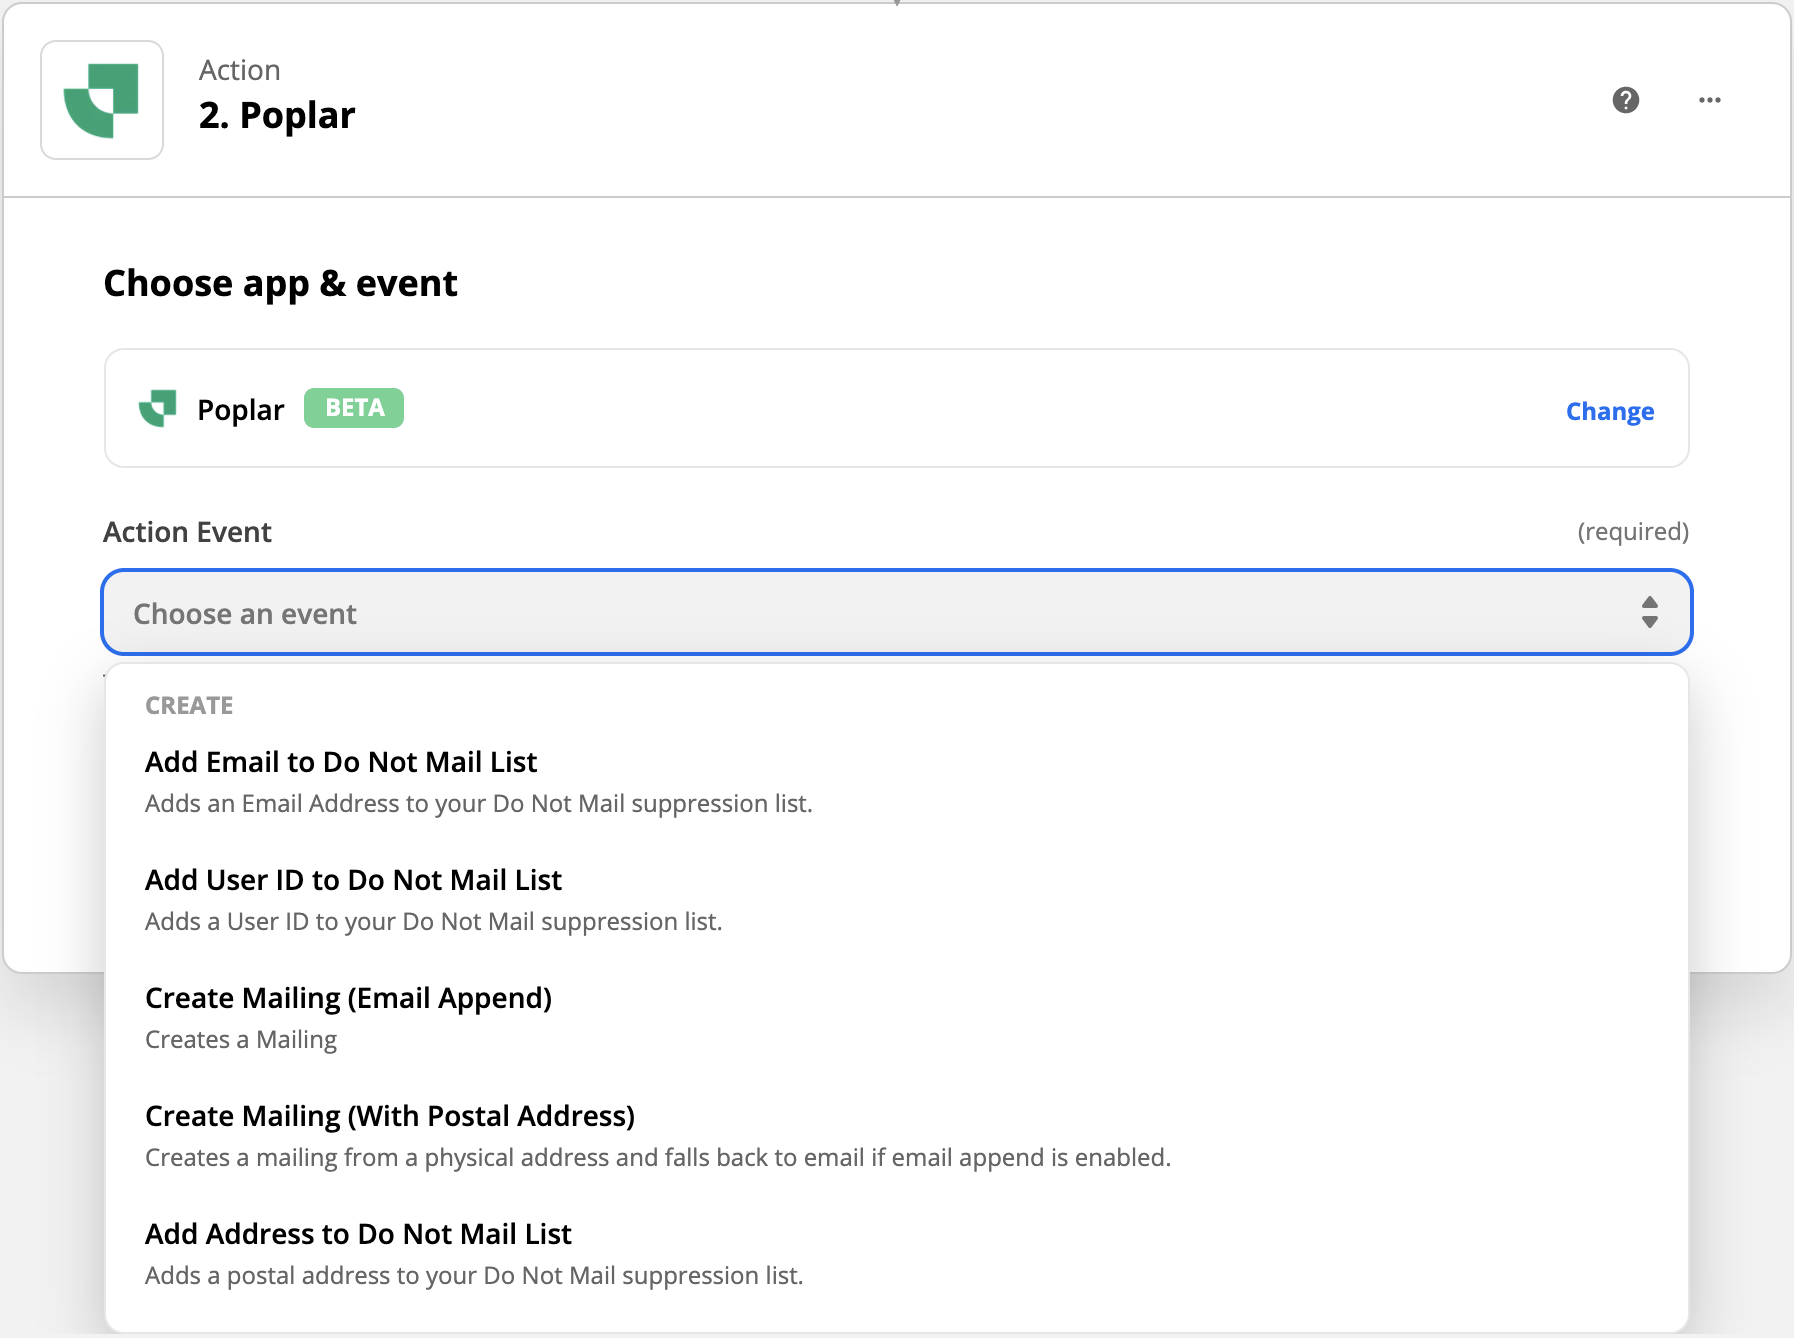
7. With Mailchimp you likely don't have address data so you'll want to select the Email Append option, but you can alternatively create additional zaps and use the other Action Events for things like updating your do not mail list.
8. To connect your account, you'll be prompted to enter an Access Token which can be found on the API page of your Poplar account.
We recommend first entering your Test key, this will allow you to test the trigger connection without actually mailing. Successful trigger requests will be visible from the History tab of the connected campaign.
Click + Connect a new account again to enter your Production key. We recommend only selecting this account when you're ready to go live.
If using your Production account, clicking Test Trigger during will trigger a live mailer.
9. Select the campaign (or head to Poplar to create a campaign and upload creative if you haven't already).
10. ( optional) Select your creative (or leave this blank if you want to run a multivariate test of any creatives enabled in the campaign).
11. Select the 4 line + button on the right and then Select the mailchimp field that contains the sample data email, this will allow us to pass the recipient email to Poplar. (see below)

12. Send a test and then hop back over to Poplar to the history tab of the campaign and you can check the digital proof we created.
13. If tests are successful, it's time to turn on your Zap! If you want to let the trigger run naturally under the Test environment for a day or two, feel free to leave your Test Account selected. If you feel ready to go live, head back to Choose Account and select the one connected to your Production key before turning on your Zap!

If you are pushing a large segment all at once from Mailchimp through to Zapier they may temporarily pause the zap and email you to confirm that you want it to be processed. Once you confirm by clicking through it will process the backlog and reenable the Zap.
Troubleshooting
Can't find the tag in the Mailchimp dropdown?
If you have more than 100 tags on the Mailchimp audience it's possible they won't pull in on the dropdown. To fix this you'll need to lookup the tag ID and then plug it in manually following the 3 steps below.

Once you copy the url paste it into a text editor and pull out the ID that is at the end. it should be a 5 digit number at the very end (not the 6 digit list ID).
https://us15.admin.mailchimp.com/lists/segments/members/tags-filter?list_id=193335&tag_ids[]=36579
Head back to your Zap and audience selection:

 Why is Zapier timing out every time it attempts to pull the Mailchimp audience?
You can remove a tag using the same approach in Mailchimp as you used to add the tag. By removing the tag after the mailing has been sent you keep the total audience size with the tag small enough to pull via Zapier. Zapier will tend to get timeouts as your list size goes above 5-10k. So it's critical to keep the audience in Mailchimp below that.
Need help? Reach out to support@heypoplar.com for assistance.