Static Creative Guide
Below you will find information on formatting requirements and export instructions for static creative designs.
IN THIS ARTICLE
When uploading creative, the platform will ask for two separate files: front and back. We always recommend designing edge-to-edge without white borders or crop marks, to avoid any risk of them appearing on the creative after cut. Before exporting, there are a few important factors to consider for an error-free upload process and high-resolution print:
- Total dimensions equal exactly...
- 4.25" x 6.25"
- 6.25" x 9.25"
- 6.25" x 11.25"
- Your file has been exported as Adobe Preset: [PDF/X-1a:2001] or [PDF/X-4:2008] or as a 300PPI High-Resolution image
- PDF/X-4 will automatically take care of flattening transparencies, opacities, and color overlays for highest quality print (read more)
- File size should be under 5MB
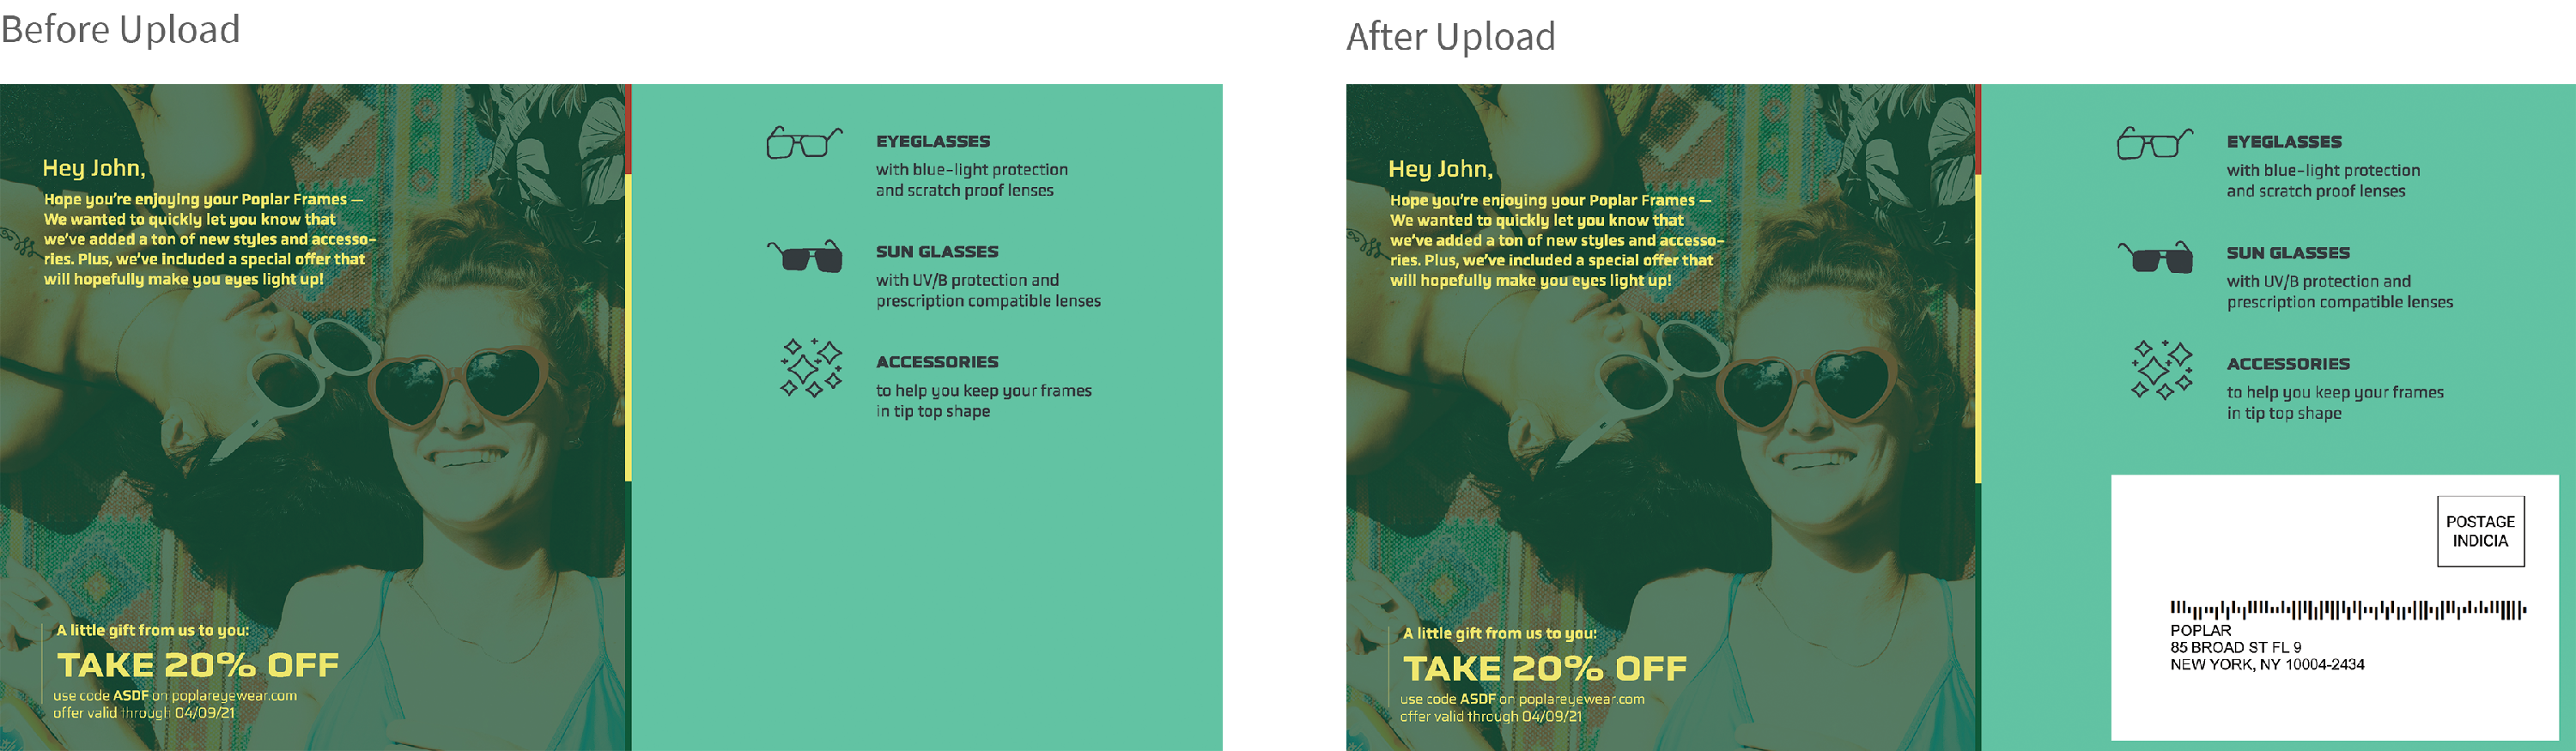
Our address block is auto-applied, please DO NOT include a white block in your back artwork. We take care of that for you
PDF/X-1a + PDF/X-4
Poplar supports two different standards of the PDF/X family: Adobe PDF/X-1a and PDF/X-4. These are subsets of the PDF file format specifically designed for reliable prepress (printing) workflows. They ensure all transparencies have been flatted, color profiles are correct, and fonts are fully embedded in the PDF file; if you do not embed the font, text may shift and/or render differently from the preview on your computer. Make sure large image files are reduced as much as possible without compromising resolution (300PPI), as the platform will only accept files under 5MB.
While PDF/X-1a is accepted and prints beautifully, we recommend the more recent PDF/X-4 preset for any new creative uploads. Here are the key differences between the two:
Color Management
- PDF/X-1a: All color data must be in the CMYK (Cyan, Magenta, Yellow, and Black) color space or grayscale. This ensures consistent and predictable color output in a printing environment.
- PDF/X-4: Supports color management through the use of ICC profiles, allowing a wider range of color spaces, including RGB, CMYK, and Lab. This provides more flexibility for high-quality color reproduction in various printing conditions.
Transparency
- PDF/X-1a: Does not support transparency, requiring all transparent elements to be flattened before the creation of the PDF/X-1a file. This ensures compatibility with older RIPs (Raster Image Processors) and printing equipment.
- PDF/X-4: Supports native transparency in the PDF, meaning that transparent objects can be maintained within the file without flattening. This allows for better print quality and more sophisticated effects in the final printed product.
Font Embedding
- PDF/X-1a: Requires that all fonts be embedded within the PDF file, ensuring that the exact fonts used in the document will be available during the printing process.
- PDF/X-4: Also requires font embedding, similar to PDF/X-1a, to maintain consistency in the final printed output
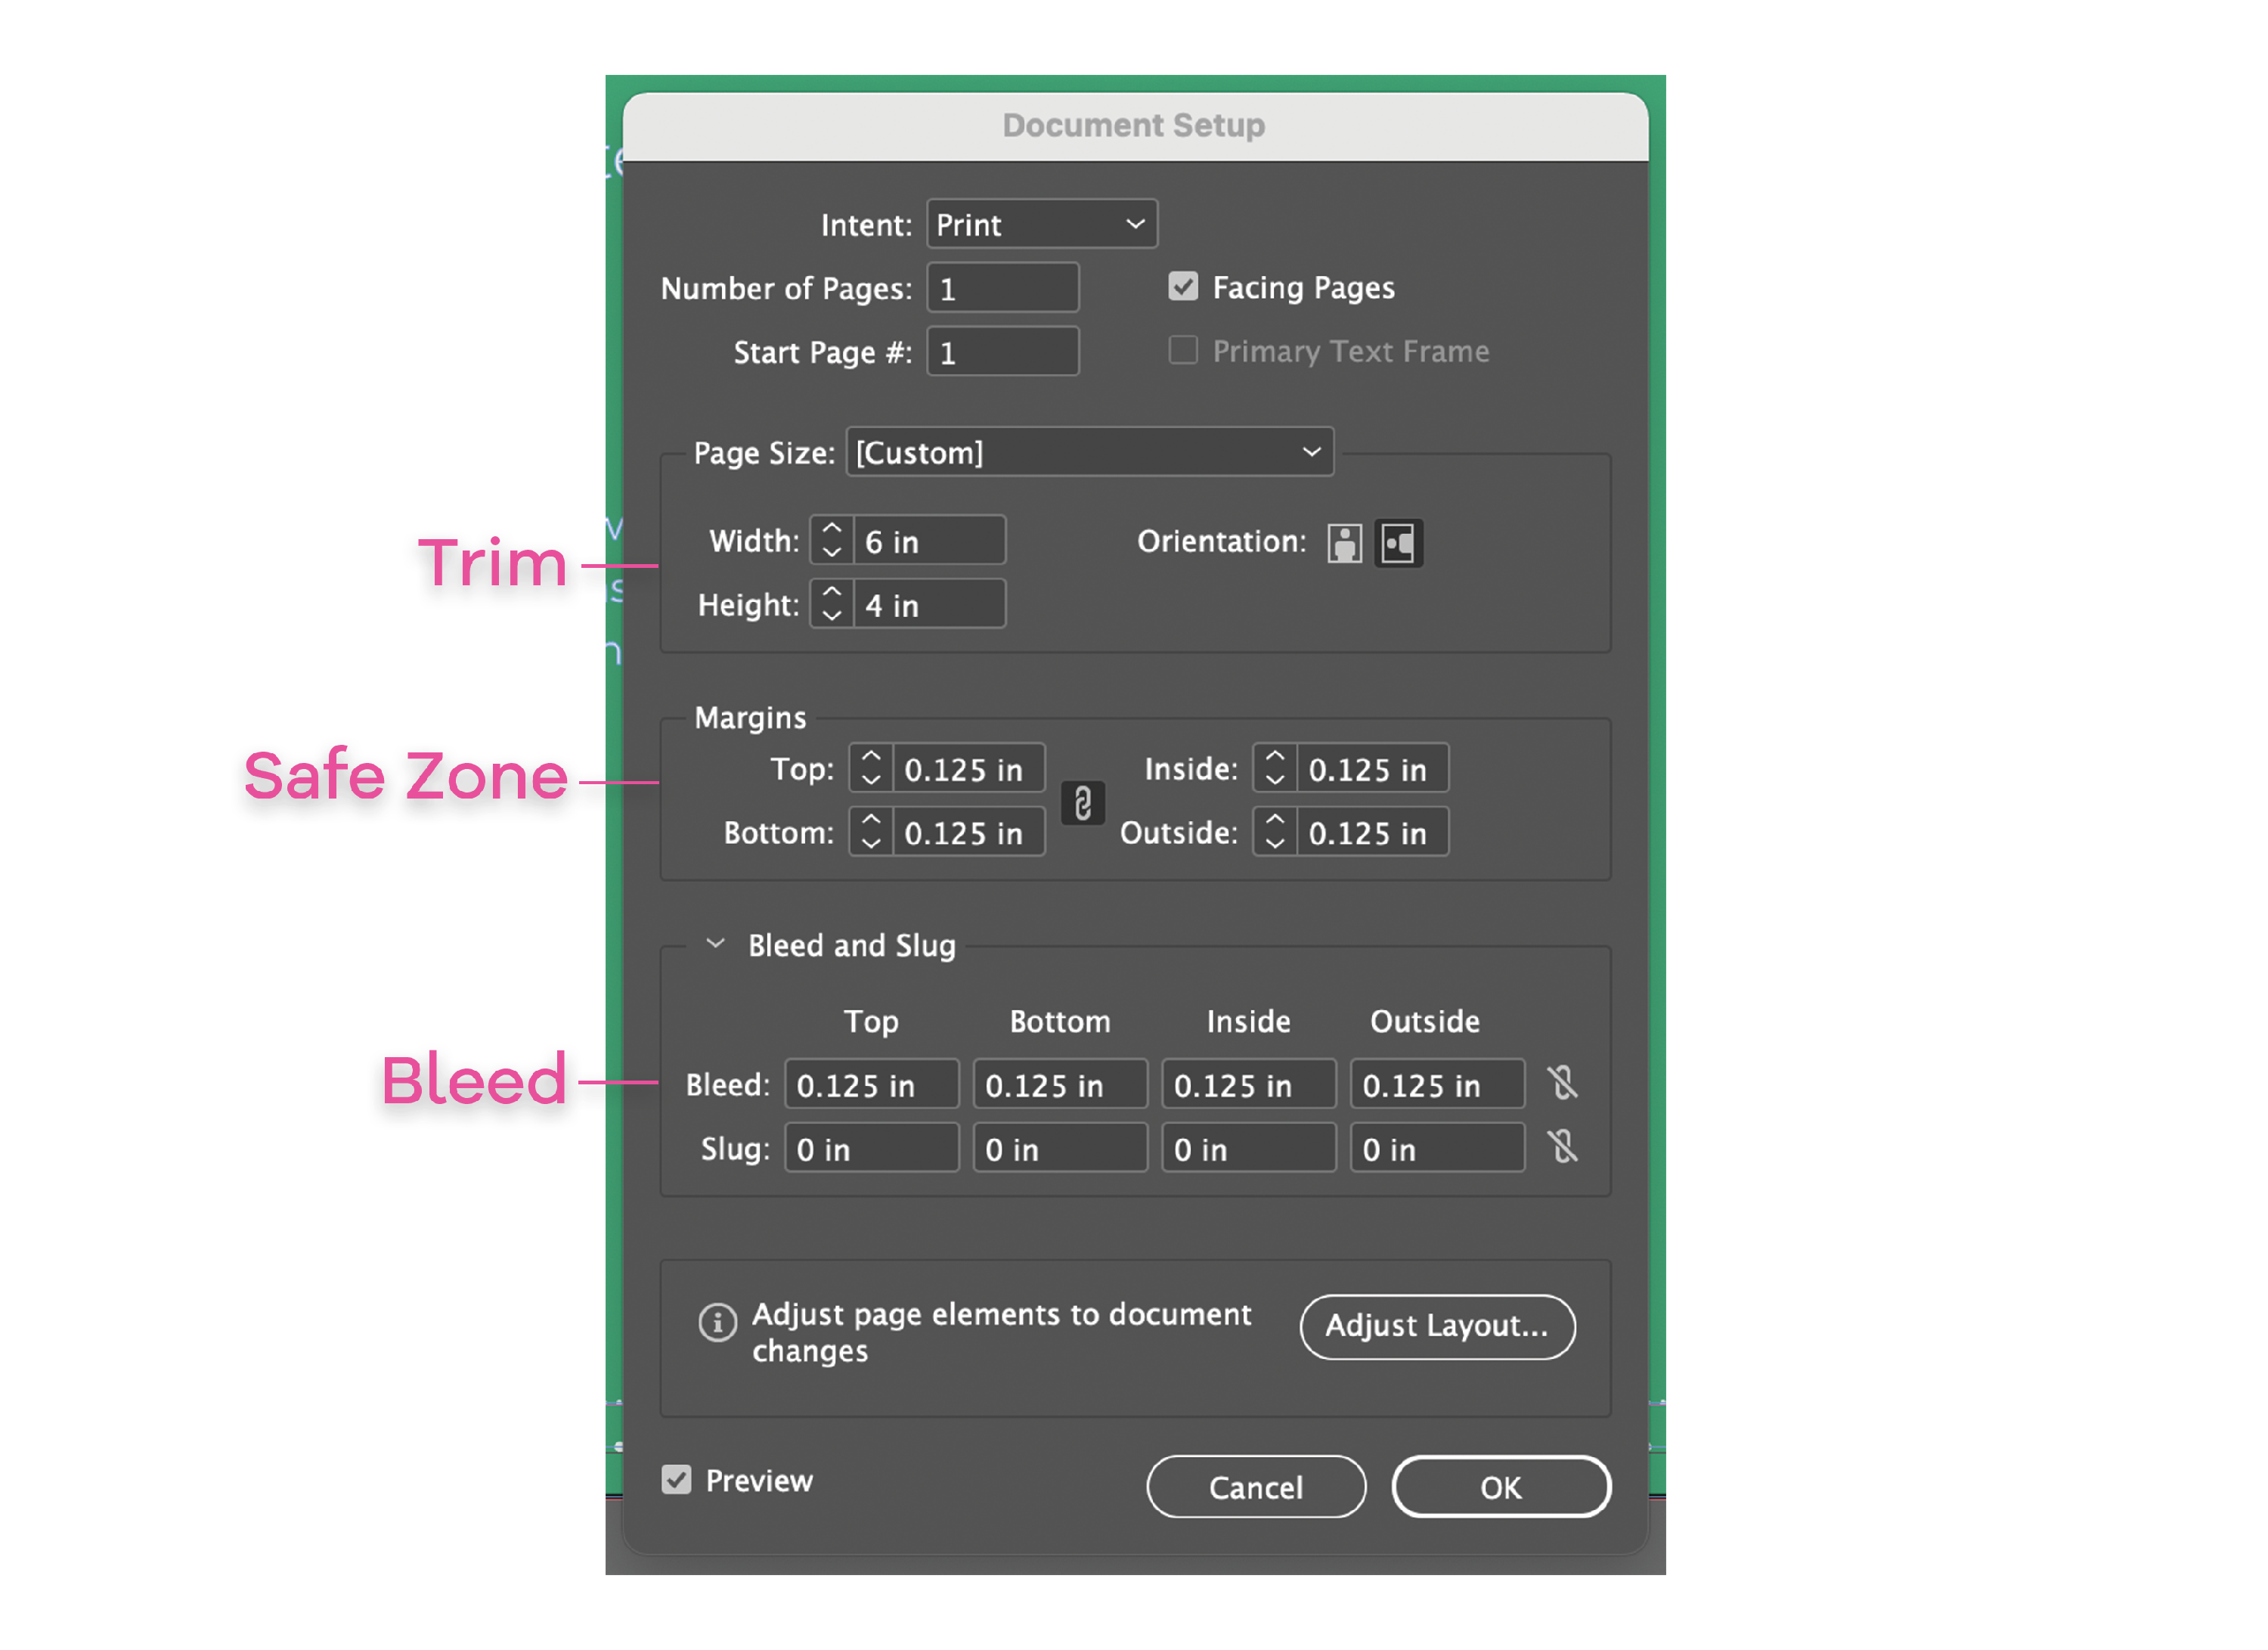
Document Setup: Adobe InDesign
Here is an example of the document setup for a 4 x 6 postcard that includes 0.125" bleed on all four sides:
Exporting
- 1
- File → Export... → Format: Adobe PDF (Print) → Save
- 2
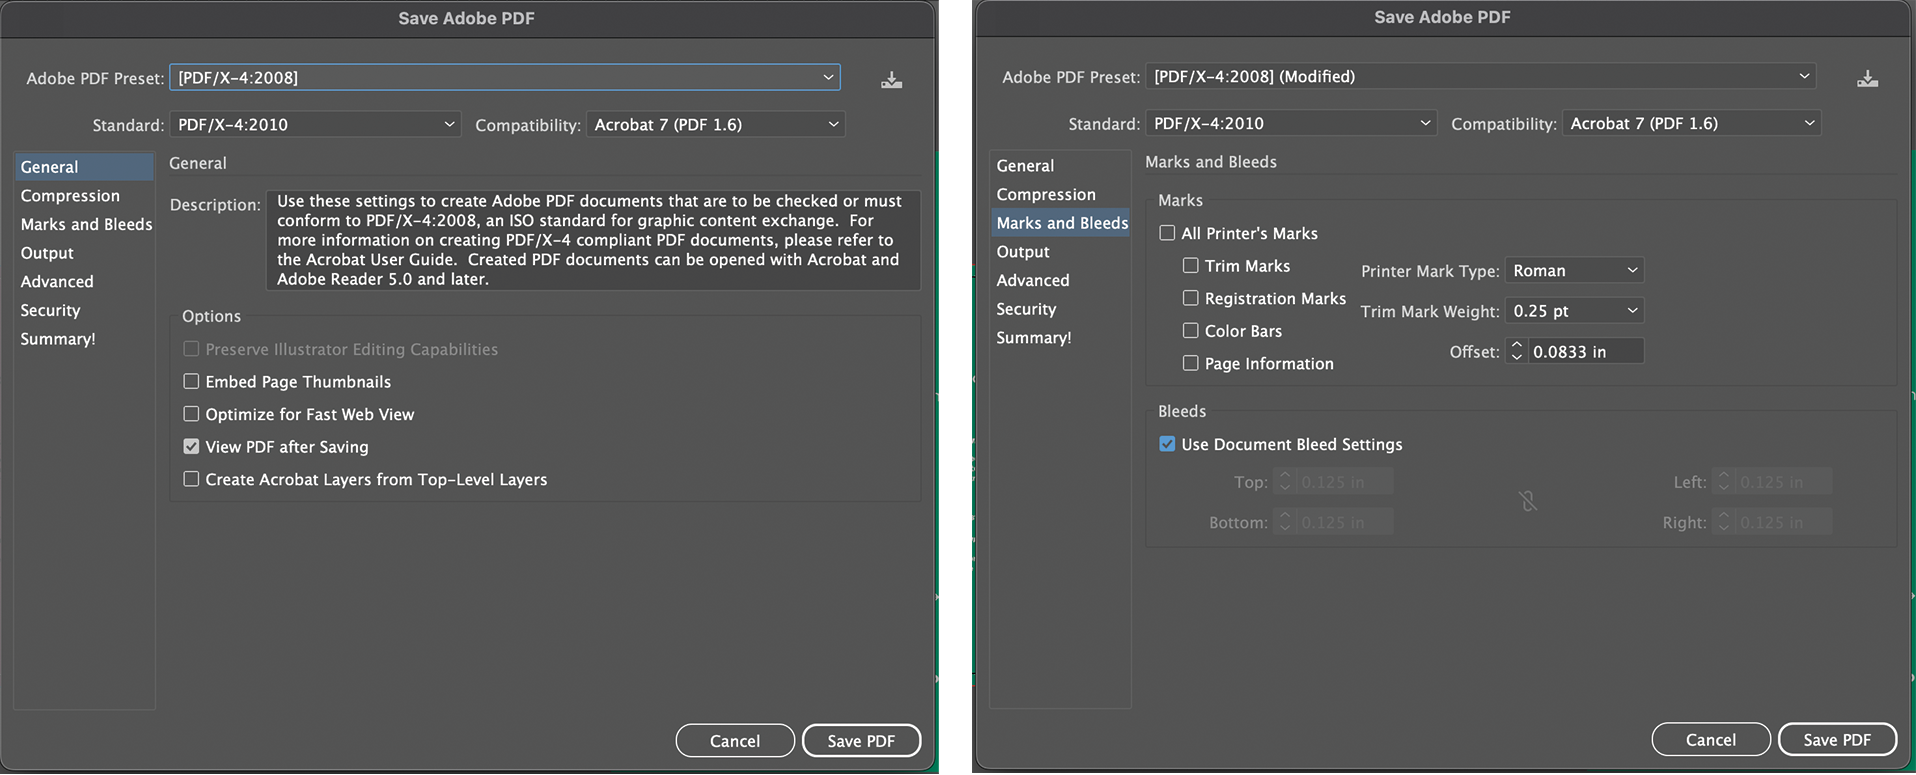
- Adobe PDF Preset: [PDF/X-4:2008]
- 3
- Marks and Bleeds → Bleed and Slug → ✓ Use Document Bleed Settings → Export
Make sure "Use Document Bleed Settings" is always selected before exporting. If it is not selected, the bleed will not be included in the final dimensions, and your file will only measure out to 4" x 6" which will trigger an error message when uploading to the platform.
Document Setup: Adobe Illustrator
Here is an example of the document setup for a 4 x 6 postcard that includes 0.125" bleed on all four sides:
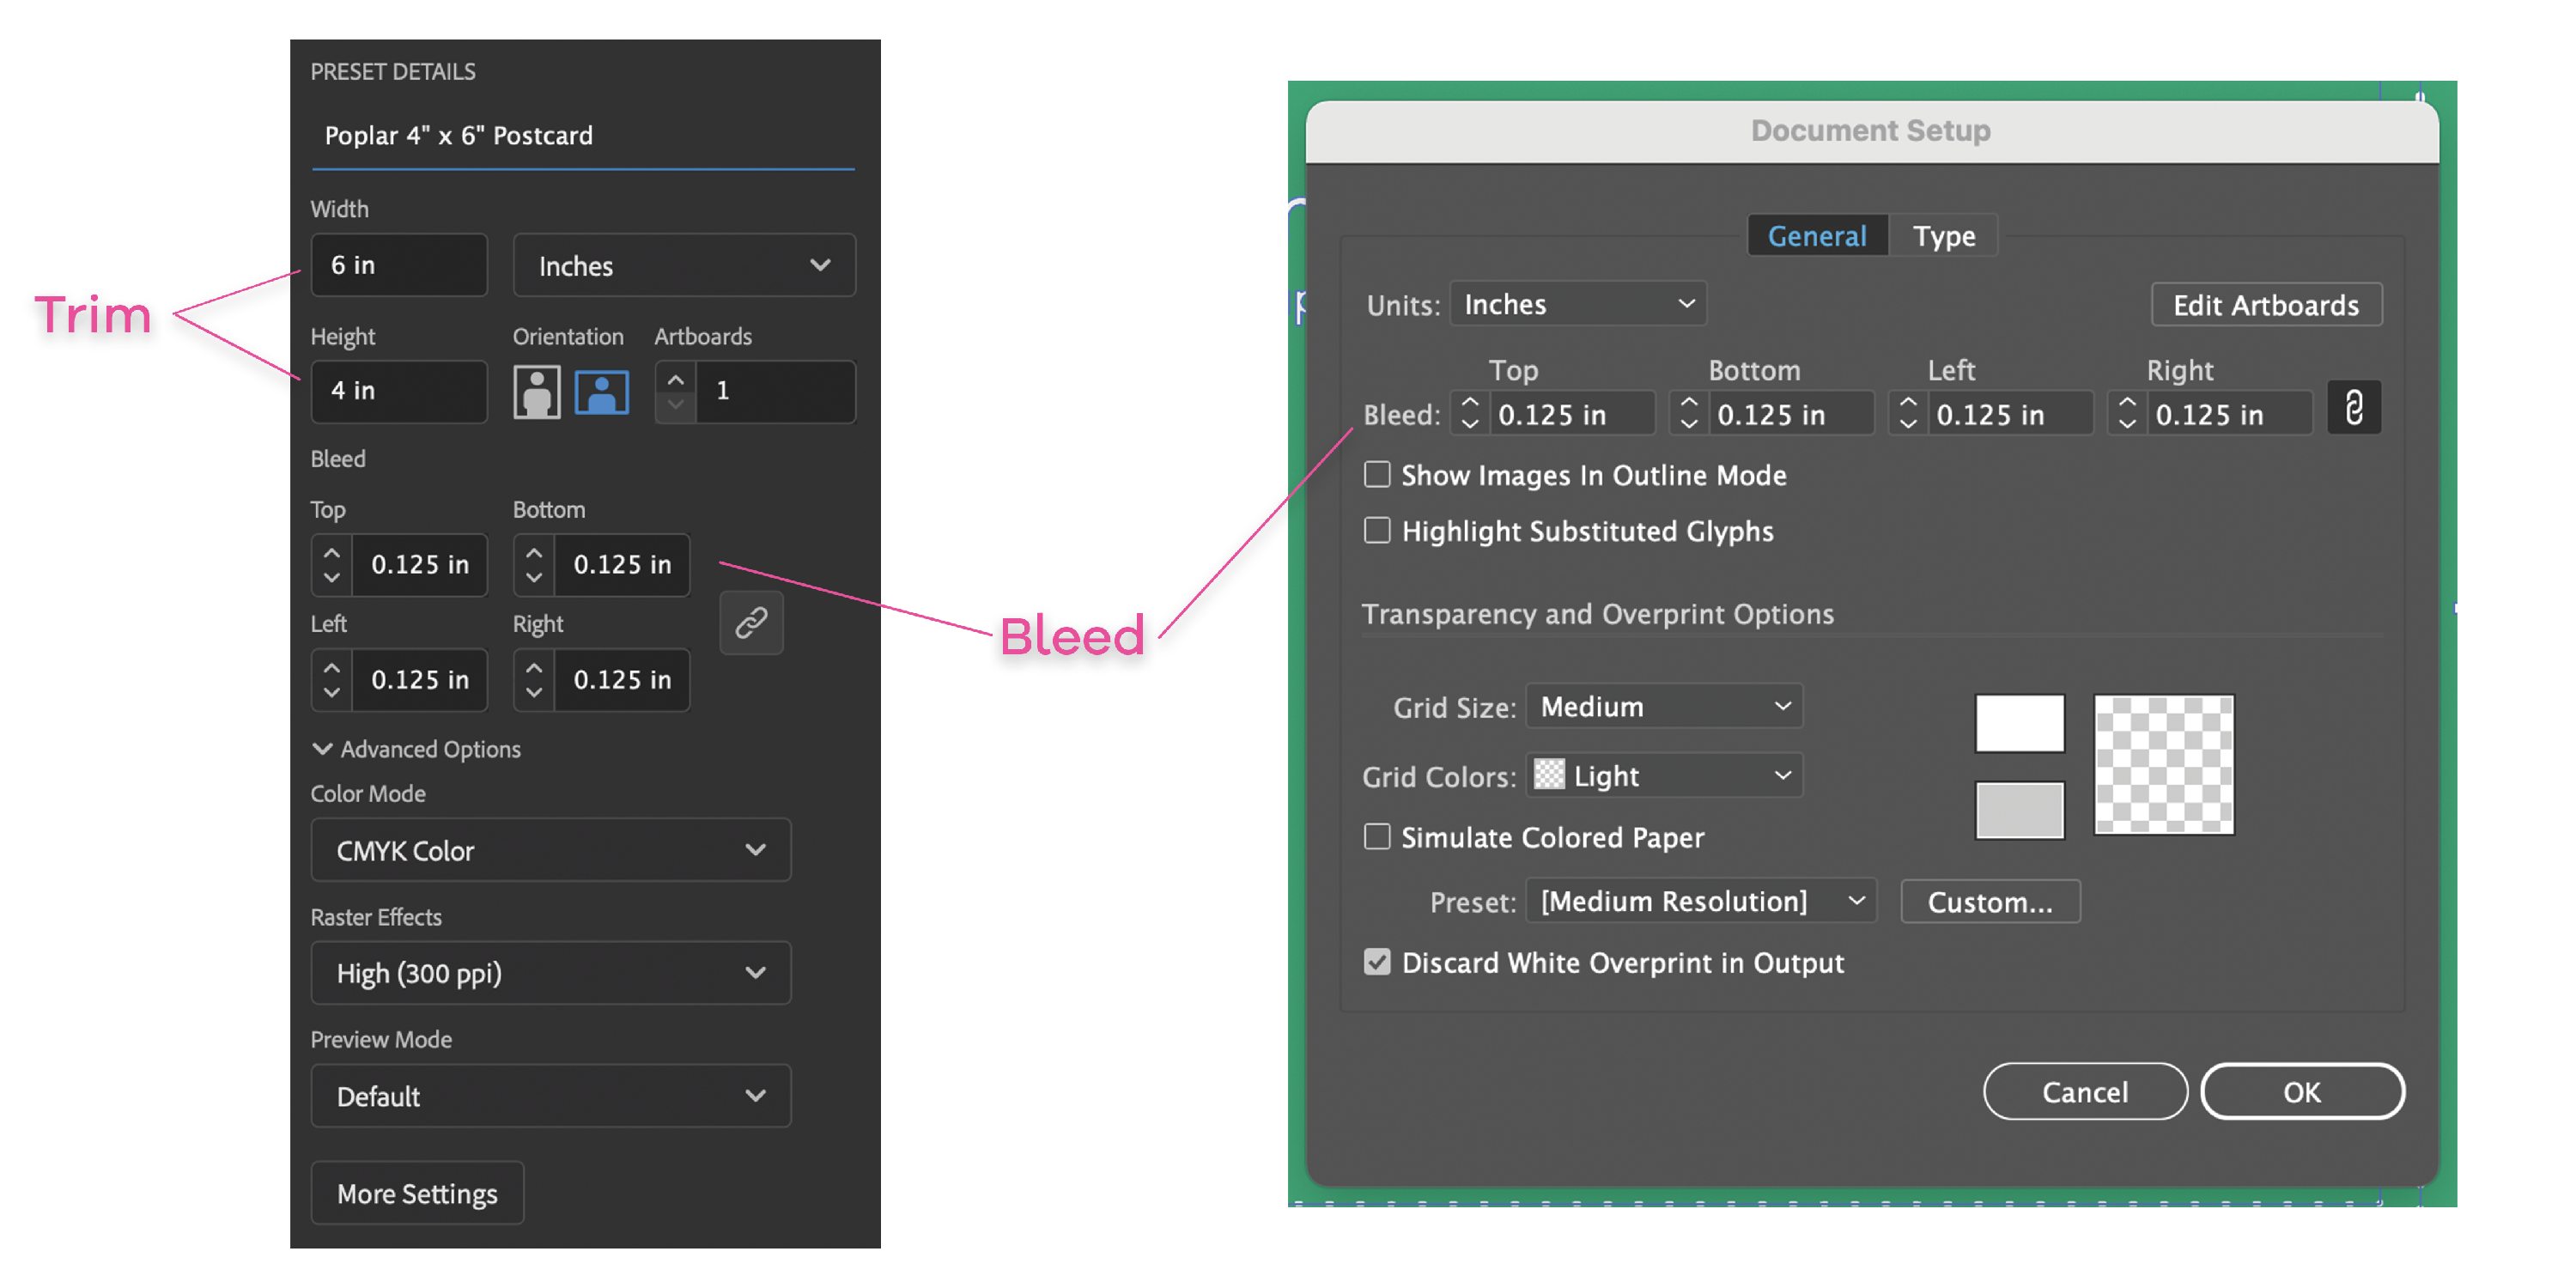
Adobe Illustrator does not provide inset margin dimensions in the document setup. We recommend creating your own or using the inset Safe Zone marker provided in the template.
Exporting
- 1
- File → Save As... → Format: Adobe PDF (Print) → Save
- 2
- Adobe PDF Preset: [PDF/X-4:2008]
- 3
- Marks and Bleeds → Bleeds → ✓ Use Document Bleed Settings (Make sure NO printer marks are selected) → Save PDF
Double check total dimensions of the file, make sure trim and safe zone indicator layers are deleted and not hidden.
Document Setup: Canva
Here is an example of the document setup for a 6 x 11 postcard that includes 0.125" bleed on all four sides:
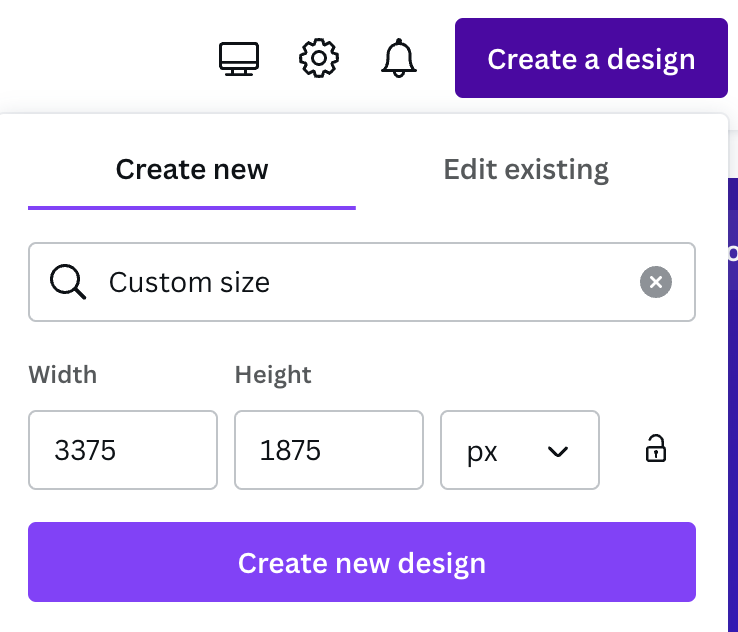
Canva does not provide the ability to add a bleed or margin so the width and height must include the bleed. You can confirm the total creative dimensions here: Templates & Specs. Create the design using the pixel dimensions instead of the inch dimensions. Using any dimensions other than pixel will result in the creative being rejected due to errors when uploading to the Poplar platform.
Exporting
- 1
-
Share → Download
- 2
-
Select PNG ( Confirm the pixel dimensions are correct)
- 3
-
Download FRONT and BACK creatives as separate files.
Exporting from the free version of Canva is not as high res as exporting from the Adobe platforms.
PNG/JPEG
We do not recommend using .png or .jpg files unless it's your only option. PDF & HTML are vector based formats that will generally print at greater than 300PPI; generating higher quality with very crisp text. The below dimensions are at 300PPI and are the required dimensions for PNG or JPG creative. The maximum file size for an image is 5MB.
| Format | Pixels |
| 4" x 6" | 1275px by 1875px |
| 6" x 9" | 1875px by 2775px |
| 6" x 11" | 1875px by 3375px |
| Bifold Short-fold | 1725px by 5175px |
| Bifold Long-fold | 3375px by 2625px |
| Trifold | 2625px by 4987px |
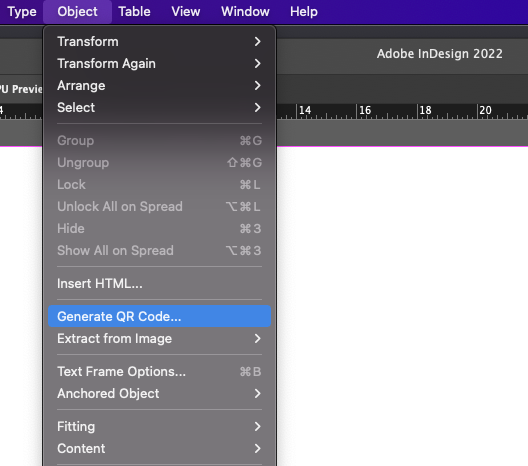
QR Codes
QR codes are commonly used to link back to client sites and work great for front-end tracking of campaigns for clients that don't get enough conversions to run a match-back (b2b or real estate). For static QR codes, InDesign has a built in QR code generator that will provide you a vector output that you can use in your creative. We recommend keeping QR codes a minimum of .75" in width, and testing the QR code with your phone in the PDF preview to make sure it works.